Simple Clip with Stroke included
-
Hello,
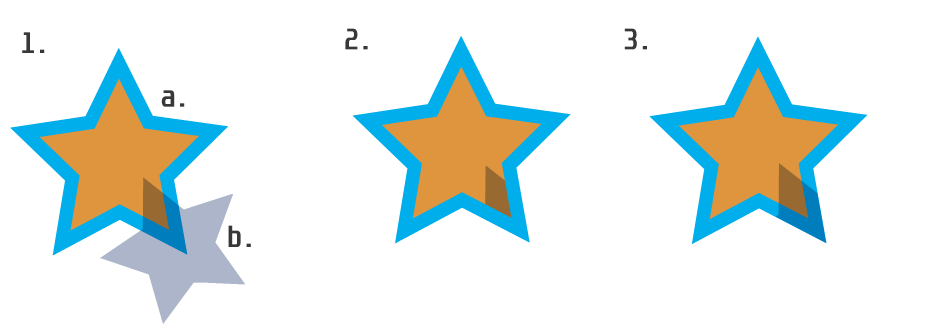
Noob question, please refer to the below image.I would like to clip shape b. (50% transparent with blend mode set to Multiply) with shape a. so that the result takes into account the stroke of a. The result would look like 3.
Result 2 is possible with placing b. inside a., but it does not encompass the stroke.
What would be the most efficient way to do this?
Thanks for your help.
-
@Victor-Vector Make the star a bit larger, place (b) inside (a) and align the stroke inside in the Stroke panel.
-
Edited:
Ouch, i think i miss the point of your question.
you would have Result 3. Sorry, kind of misreading.
But i let this post stay as it is, maybe its helpful for anyone.I don't know how you created your objects.
Here's how I did it.
- create a star
- create a rectangle
- select the rectangle and cut it in the clipboard with Ctrl+x
- double click on the star (to put it in isolated mode)
- now paste your rectangle
- place it over the star as desired
- double click on the Canvas (to come back from isolated Mode)
- select the star and give it an outline
And here is my Result

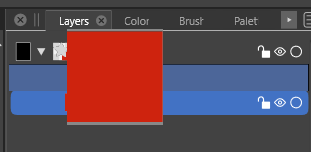
you could also drop your rectangle
in the layer panel into your Star
this gives me the same Result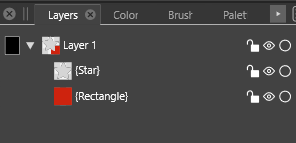

-
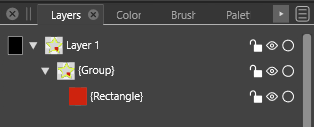
@Victor-Vector You may want to rearrange (with drag&drop) the Fill / Stroke / Group items in the Appearance panel, to have the "Group" on the top.
-
@vectoradmin
interesting did not know that
-
@Subpath Indeed. Worth having your post stay as it is because it demonstrates options for grouping techniques. Thanks!
@vectoradmin
Thank you for helping with this. Your first solution (stroke aligned to the inside of a slightly larger star) works very well and is probably the best way to do this. It seems obvious to me now, haha.I was excited about your second solution (rearranging the fill / stroke / group items in the appearance panel) because I did not even know that was possible. It has some very interesting results when the stroke is centered along the path. Cool!

This sparked interest in me to know why an outer stroke is not considered by the software to be part of the object for some effects and especially selection/export boundaries.
Is it possible to see any part of the stroke outside a shape as the new shape boundary? If so, that may be an option to consider to add functionality or ease-of-use to VectorStyler. -
@Victor-Vector said in Simple Clip with Stroke included:
Is it possible to see any part of the stroke outside a shape as the new shape boundary? If so, that may be an option to consider to add functionality or ease-of-use to VectorStyler.
When clipping into a group, the clipping area is defined by the group shape.
When drawing (default) strokes the stroke is centered on the shape.
So the two combined will get the above result.This is why aligning the stroke inside is the easiest solution.
There is an other way (keeping the stroke centered) but it is way more complicated:
- open the Appearance panel.
- select the clipped group, and select the "Group" content in the Appearance panel.
- click on the Shape Filter icon in the bottom of the panel (the [Fx] icon).
- select Outline -> Offset Path, and set the offset to half the stroke width.
- confirm: the group shape is offset, but only for the "Group" content, the stroke and fill will stay with the original shape.
- this offset path on the clipping shape is "live", modifying the shape will update it automatically.
- the only drawback: if the stroke width changes, the offset path amount must be updated manually.
-
@vectoradmin I appreciate you taking the time to provide another way to tackle this, as it might come in handy for the future, and it helps me learn the nuances of VectorStyler.
Thank you being so responsive to the community!