Exporting SVG's for Cricut machines doesn't work
-
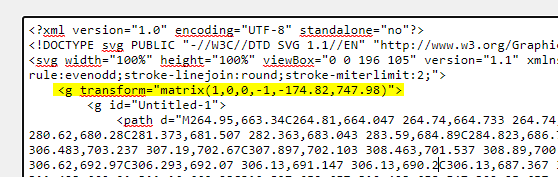
@vectoradmin Hi, I tested that point right after your release, but i have forgot to write you feedback. Now I have a bit of time. It doesn't help. My knowlege about xml is somewhere 5cm above the ground level, so I just started swapping tags one by one. The reason why Cricut Design software is rejecting output file from VS are parameters in first <g> tag.
Designer:
VectorStyler
After removing 'scale' param. it appear but flipped vertically.
Than I swap whole line from Affinity designer file and works properly, but I coud not import it to VectorStyler again.Maybe that will help you a bit. Let me know when you need me. I'll keep an eye on it.
MacBook Air M4 24Gb, Tahoe 26.3.1
-
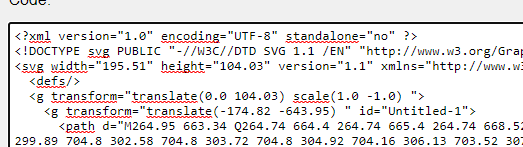
@encart Yes, VS has to flip everything as it uses bottom up coordinates (cartesian coordinates). I will think of a solution, where the SVG coordinates are directly converted without a flipping group.
-
@encart In build 1.0.025 the flipping SVG transform is merged into a single transform as it was shown in the working example. Let me know if there are still issues.
-
@vectoradmin YES!
 Works flawlessly. Thank you very much.
Have a question related to this topic.
I'am not sure if it's only my problem, but when I export SVG file i have to keep in mind to add .svg extension after the name. Otherwise file has unknown format icon and is unrelated with any software. Similar problem as we had with workspace file. -
@encart Will fix the extension issue. Is this on Windows?
-
@vectoradmin Yes, I'am using Windows.
-
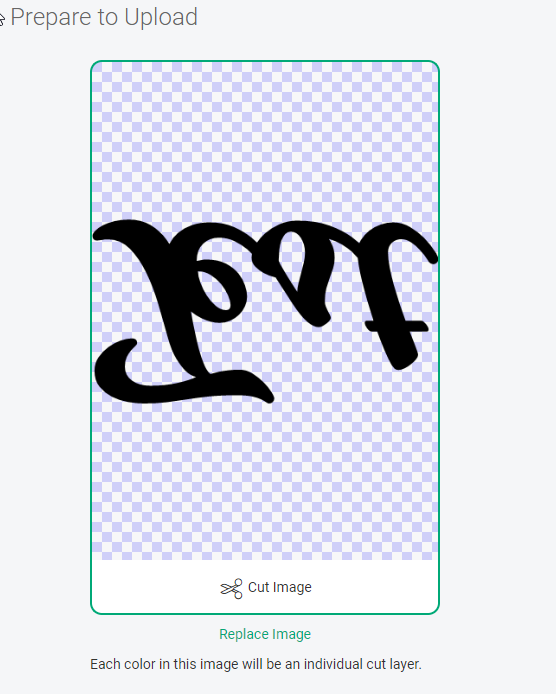
I am creating an a simple design to use for my Cricut machine. I would like to export this as an SVG so it keeps all the layers. I found this tutorial and wasn't able to get the same results when using my own design. It works perfectly if I create a box and text just like in the video, but my design does not include text.
I have taken two shapes and merged them together by first grouping them and then rasertizing them. I then made a new layer with a new shape on top of the raserized shape and then grouped those together. Then I followed the same steps as in the video and have not been able to get it to work in Cricut. I'm not entirely certain the way I'm exporting is correct.
Is there a better way to merge shapes in Affinity Design than the way I described above?
Is the fact that I have a rasterized image the source of my problem?
If anyone is familiar enough with AD for Mac and using it in conjunction with Cricut I could use your help. https://www.craftyhangouts.com/cricut-for-making-shirts/
I'm not a designer and I'm just attempting my first forays into using this program for simple Cricut designs. -
@Annieclover2 Have you tried the steps in the tutorial without rasterizing?
And can you post a link to the tutorial or the specific video you mention so we can get an idea about what the issue could be?Also: the Cricut machines only cut material or they also print then cut?
-
@b77 the Cricut machines will only cut, but the software has a feature to print things to your printer first, then there are ways to calibrate the Cricut to the printout to cut things out from what was printed.
-
@Annieclover2 I'm not sure why you want to rasterize your project. If you want to use Print &Cut feature than rasterize it and save as PNG with transparent background. But If you want to cut it , than do not rasterize, save it as SVG file and import to Cricut Design. I'm sure I can help you.
Edit: If you export your project in that way, than you should have no problems. You will still be able to move elements relative to each other, change their color, size, etc.
https://recordit.co/GtzFPPmaJN -
Try reading the Cricut help pages - https://help.cricut.com/hc/en-us/articles/360009553213-Image-uploads-unsupported-items