Inking Process Help
-
I need a little help knowing what I need to do differently in my vector inking process as I convert the steps over from Illustrator to VS.
I trace over my sketch with a pen or brush tool - then expand strokes (under the styles menu) I understand if I had any shapes, I'd need to convert those to curves. I feel like I need to do this step several times - expanding the strokes...
Then I select all and hit the divide option from the boolean operations. I try to use break apart and ungroup all, but things still seem to be connected as compound paths and I don't know how to break them apart so I can delete the overlap parts.Here is a video of my process up to where I get stuck
If I'm missing things or there are better ways to accomplish this in VS, I'm all ears
🍎 macOS Tahoe 26.2, Mac mini (M1, 2020), Chip Apple M1, Memory 16 GB
Cintiq 27QHD Display and LG Ultra HD Display -
@Boldline I made a similar drawing of the claw with the Pencil tool and after expanding the strokes, Divide splits the objects correctly here. Could be something different with some of the paths used for Divide in your screen recording? If that part of the drawing was made available for the developer to test, maybe it would help figure what causes the Divide glitch.
Btw, when tracing manually over a sketch, you could try the Path Sketch tool. It will automatically join intersecting strokes by using only the longer part of a stroke for the new object: https://vectorstyler.com/documentation/shapes/pathsketch/
MacBook Pro (Intel) running Monterey 12.6.4
-
@Boldline The process is complicated a but when using Brushes. The Expand Stroke will result in an object with the artistic brush content and a bend effect on it. This is why a convert to curve is needed to get to the filled shapes.
For the type of drawing in the example, the Pen tool will do, with the Pressure mode (in the context panel) set to Selected to use the current width profile selected in the Stroke panel.
The pen tool will result in regular strokes (not artistic brush paints), and expanding these results in filled shapes. -
@b77 Thanks for the reminder on the pathsketch brush! Once I tried it out, I remembered playing around with it a long time ago but had forgotten about it - I appreciate it! I'm going to try using it for my next drawing and see how it goes. I'm open to changing my process if it makes sense and I can do it the same speed or faster.
-
@Boldline There is room for improvement with the Path Sketch tool, so the more people use it and provide feedback, the better.

I for one would just suggest making the last stroke semi-transparent (or another color and semitransparent?) when the user holds down the Option key, to show the user there's a second try.
MacBook Pro (Intel) running Monterey 12.6.4
-
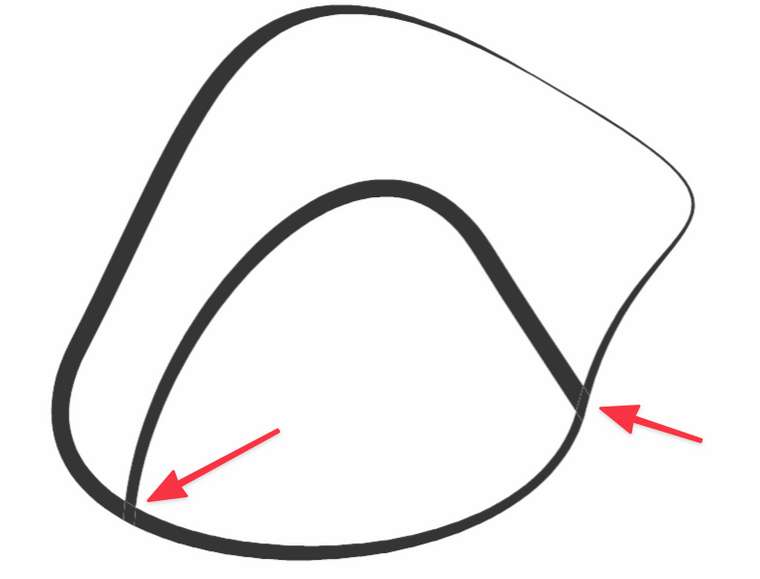
@vectoradmin Thanks for explaining. i understand about the pressure setting overriding the default settings of a brush and a bend effect being necessary to create that effect. I can also understand using a plain stroke with the setting set to selected - and picking a taper option from the width profile in the stroke panel. I was able to do the latter and it worked fine in terms of expanding - clean boolean divide and then combine. (though I can still see a faint outline of the pieces - see attached image below this paragraph) Could you explain the proper order of steps you'd use to do this? Draw the strokes - expand stoke, convert to curves, divide, combine? Am I missing anything else you'd do? (anyone can chime in on this)
Going back to artistic brushes again - is there a way to make the same process above work smoothly with those? In my line of work, I have to be able to provide a fool-proof flattened vector to my clients to use to print on shirts - I'm all for keeping things editable and adjustable in the design process - but in the end, I need to be able to export something permanent and clean. Even if it's a longer term solution, can this be on the list of things to improve upon? I'd like to be able to utilize the pressure sensitivity options of my tablet for example, and use artistic brushes knowing in the end, I can easily expand them and ultimately get rid of the visible bend effect outlines, etc.🍎 macOS Tahoe 26.2, Mac mini (M1, 2020), Chip Apple M1, Memory 16 GB
Cintiq 27QHD Display and LG Ultra HD Display -
@b77 Maybe we should make the ideas for the path Sketch tool an new thread? I'd like to delve into it deeper.
-
@Boldline For the above example I would do this: https://vimeo.com/560902532
the steps are:
- use the pen tool to draw the shapes.
- use the variable width tool to adjust width.
- if pressure is used, then width adjustment is not required.
- select all and then use the Eraser mode of the Pen tool (Shift+ with the Eraser checked in the context panel) to cut the extra part.
- expand the resulting strokes. since these are strokes expansion will do.
- then use Union to create a single shape.
The shape builder tool might also help for cleaning up the expanded strokes.
The problem with using the brush tool is that the result is an artistic (vector) brush, which is basically a bend / mesh distortion of an artwork along a path. This results in much more complex shapes after Expand Stroke and Convert to Curves, and much more nodes. The result could be similar, but with so many nodes (and shapes) the combine (Union or Divide) operations are slower.
For the next build I could add an option to have the Expand Stroke also convert brushes to curves (so the extra step is removed). But the result will be still too complex.
-
@vectoradmin Thanks for the video and steps - That might be a better system of using the eraser to eliminate the extra. I had not given that a lot of thought, but now I'm excited about that possibility. It cleans things up and eliminates a messy step in the process.
I followed the steps in your video and description - the first time, I saw the red line appear as I tried to erase, but nothing happened and a red line stroke appeared (did not capture on video yet) - I tried again with the screen capture on - and now I'm not getting any red line of an eraser - instead it seems to act like a regular brush stroke.
what am I missing here?🍎 macOS Tahoe 26.2, Mac mini (M1, 2020), Chip Apple M1, Memory 16 GB
Cintiq 27QHD Display and LG Ultra HD Display -
ok tried again and this time I got the red line - but I got it regardless of pressing shift or not.... I'm not following what the shift modifier is doing. Also it's not erasing as you were able to make your line do -
I guess I'm just getting confused because at times, just having the "eraser" box checked, I can get the red erase line - (nothing happens to the line I'm intersecting), other times, if the eraser is checked, I need to press shift as well to get the red eraser line - but either way, it's not resulting in anything being erased -
@Boldline There should be a red line only when holding Shift+, and the Eraser mode is checked.
Also, the objects should be selected before activating the Pen tool, but that was the case in the video as I see it. -
-
@vectoradmin ok thanks. and thank you as well @b77 for noticing that.
I tried using the pencil tool instead of the pen tool, but I'm not getting a different result.
Here is a video of my latest attempt. Am I missing a setting? I used the pencil tool to make a circle, I adjusted the width for fun, I added another stroke with the pencil tool intersecting the circle. I selected it all and then went back to the pencil tool. I clicked on the eraser box at the top - I held sown shift as I drew a line intersecting the existing stroke and saw the red line appear, but nothing happened. I saw you put "shift+" am I supposed to be holding down another key as well besides shift? When I let go of the shift and made new erasing lines, it did the same thing; red lines, no cutting or removing.
assuming this is somehow user error with me - is there a reason just clicking the eraser tool checkbox would not be enough to turn the pencil into an eraser - what does the shift modifier key add to that equation?
Sorry for all this - I'm really trying to figure this out because this could be a better way for me to ink my work.
I'll keep playing around with it. -
@Boldline It looks like there is some issue here that I cannot replicate. After releasing the mouse, the red marker should disappear and the segment should be cut. I will have to try this on El Capitan.
EDIT: it might also be that this is in conflict with some settings.
-
@vectoradmin would it help to send a file after I've tried a few eraser lines? (I sent a file earlier today on another issue)
-
@Boldline Yes, but also send the settings.xml file as it could help identify the differences. Also: was this on an external screen or using a tablet by chance?
-
@vectoradmin It was done on a wacom cintiq 27 inch monitor attached to my imac running el capitan.
where do I locate the xml file to send? is that in my library>application folder under VS? -
@Boldline The settings.xml is in ~/Library/Application Support/NumericPath/VectorStyler1.0/vector/data/resources/ folder. Use the Go To command of Finder to open the ~/Library/ folder. The settings.xml file contains the settings made in preferences.
EDIT: one thing to try out if the pencil eraser error can be replicated on the main screen using the mouse.
-
@vectoradmin said in Inking Process Help:
@Boldline The settings.xml is in ~/Library/Application Support/NumericPath/VectorStyler1.0/vector/data/resources/ folder. Use the Go To command of Finder to open the ~/Library/ folder. The settings.xml file contains the settings made in preferences.
EDIT: one thing to try out if the pencil eraser error can be replicated on the main screen using the mouse.
In my case mouse works properly, but doesn't work on tablet.
MacBook Air M4 24Gb, Tahoe 26.3.1
-
@vectoradmin I tested this out some more this morning. I have two monitors - an iMac screen and my main screen - a wacom cintiq 27 inch. I have a traditional mouse connected so I can navigate between the two screens. Typically I use the mouse to operate the imac screen and use a stylus to work on my cintiq screen.
I was able to get the eraser to work when VS was open on either screen and with either the mouse or stylus today. I had not closed out and restarted VS yesterday - so maybe that was part of the problem? I still had a few funky things happen today, but I need to try them again now that I know the eraser is working overall.I did notice that if my tool was set to the stroke width tool, if I hit the shortcut key "f" to go to the pencil tool, it did not highlight the pencil tool as expected. For the sake of testing, I found the "F" shortcut to jump to pencil also does not respond if you're currently using the text tool
")