Inking Process Help
-
@Boldline It looks like there is some issue here that I cannot replicate. After releasing the mouse, the red marker should disappear and the segment should be cut. I will have to try this on El Capitan.
EDIT: it might also be that this is in conflict with some settings.
-
@vectoradmin would it help to send a file after I've tried a few eraser lines? (I sent a file earlier today on another issue)
-
@Boldline Yes, but also send the settings.xml file as it could help identify the differences. Also: was this on an external screen or using a tablet by chance?
-
@vectoradmin It was done on a wacom cintiq 27 inch monitor attached to my imac running el capitan.
where do I locate the xml file to send? is that in my library>application folder under VS? -
@Boldline The settings.xml is in ~/Library/Application Support/NumericPath/VectorStyler1.0/vector/data/resources/ folder. Use the Go To command of Finder to open the ~/Library/ folder. The settings.xml file contains the settings made in preferences.
EDIT: one thing to try out if the pencil eraser error can be replicated on the main screen using the mouse.
-
@vectoradmin said in Inking Process Help:
@Boldline The settings.xml is in ~/Library/Application Support/NumericPath/VectorStyler1.0/vector/data/resources/ folder. Use the Go To command of Finder to open the ~/Library/ folder. The settings.xml file contains the settings made in preferences.
EDIT: one thing to try out if the pencil eraser error can be replicated on the main screen using the mouse.
In my case mouse works properly, but doesn't work on tablet.
MacBook Air M4 24Gb, Tahoe 26.3.1
-
@vectoradmin I tested this out some more this morning. I have two monitors - an iMac screen and my main screen - a wacom cintiq 27 inch. I have a traditional mouse connected so I can navigate between the two screens. Typically I use the mouse to operate the imac screen and use a stylus to work on my cintiq screen.
I was able to get the eraser to work when VS was open on either screen and with either the mouse or stylus today. I had not closed out and restarted VS yesterday - so maybe that was part of the problem? I still had a few funky things happen today, but I need to try them again now that I know the eraser is working overall.I did notice that if my tool was set to the stroke width tool, if I hit the shortcut key "f" to go to the pencil tool, it did not highlight the pencil tool as expected. For the sake of testing, I found the "F" shortcut to jump to pencil also does not respond if you're currently using the text tool
-
@encart I assume you used Windows, what is the tabled model?
-
@vectoradmin said in Inking Process Help:
For the next build I could add an option to have the Expand Stroke also convert brushes to curves (so the extra step is removed).
Maybe that could be an added "expand all" option? But keep the two individual steps in VS, as there's a need for each individually
You also mentioned it's still going to be complex, and I understand that. Even if we don't do the expand, divide, unite steps, if we use artistic brushes for anything, at some point we need to be able to compress down and output a flattened vector.
Putting aside all the Boolean operations I mentioned above, if I have a vector path that I expanded ahs had the bend effect still there, how do I remove that bend effect in the end? -
@Boldline The bend effect can be removed with the Effects -> Remove Last Shape Effect or in the Shape Effects panel. But that will straighten out the brush content. Maybe if you want to work with the filled shapes, convert to curves is better.
-
@vectoradmin said in Inking Process Help:
Maybe if you want to work with the filled shapes, convert to curves is better.
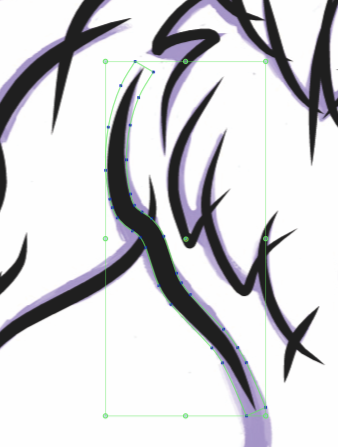
I was asking about this because I've tried this and it does not seem to work for me. In this video example, I laid out some artistic strokes and then expanded them because I assume that is the first step before converting to curves (plus convert to curves was grayed out before doing expand stroke) When I do the convert to curves after that, nothing seems to change. I can send the file at this point if it helps
-
@Boldline Use the Convert to Curves not the Convert Shapes to Curves.
-
@vectoradmin I saw that I did the "Convert Shapes to Curves." instead of "Convert to Curves"
I tried again now with expand strokes, convert to curves, and then I hit "ungroup all" that seems to have separated the bend from the expanded stroke - but the bend itself is still there - just detached from the expanded strokes. Is there another step in the process or do I need to select one of them (since they are empty stroke and empty fill) and then hit "select same as" and then delete manually?
-
@Boldline In this video https://recordit.co/6Y1mMMIlZF the following steps are used:
- starting with a vector brush.
- Expand Stroke the brush results in a group, that contains an object with the bend effect.
- ungroup reveals the object with the bend effect.
- convert to curve drops the bend effect and results in editable paths.
The ungroup is not necessary, but it helps identifying where the bend effect is.
-
@vectoradmin Jumping back over to this one again.... I still run into issues getting rid of the taper bends after expanding. I'm sure part of it is my using pressure sensitivity in my lies, etc. is there a way to select>similar and have an option listed in there that would target the selection of all the taper bends no longer needed in the design now that it's been expanded and converted to fills? This might be a great way to solve this problem - one added step to select them all and then delete. The bend tapers are interesting because when one is selected, it acts like a stroke complete with nodes... but in the fill and stroke indicators squares, it shows as no fill and no stroke - I tried to grab one currently and select all similar fill and stroke, and it did not select them. As a test I made a no stroke and no fill shape and then duplicated it and did the select>similar fill and stroke and it grabbed all of the copies I had made...
Couldn't this be a potential solution with the no stroke, no fill leftover taper guides?
-
@Boldline I think additional Select -> Similar or Select -> Attribute options might help. For example there could be an option to select objects with similar effect types (like bend in this case), or to select all objects that contain a certain effect.
I added this to the backlog as a new feature, it is not a complex issue.
-
Great! This would offer a solution the times users want to make use of the pressure option and still expand and divide those pressure based strokes. Thank you!