Intertwine Feature and a way to fake gaps
-
Intertwine Feature and a way to fake gaps
Part one (this Post here)
Part two (some finds)
https://www.vectorstyler.com/forum/topic/5572/intertwine-feature-and-a-way-to-fake-gaps/3
.
.
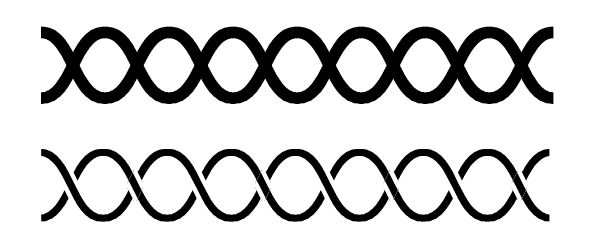
Intertwine is a new feature in VS since version 1.3.
Which work only with at least two separat Objects.Unlike the "Crossing Gap" shape effect, which only works
with a single path, the "Intertwine" effect doesn't offer
gap settings. At least, none that I'm aware of. However,
these can be faked. In this thread, I'll show way how.
.
.
Some preservationWe first need at least two objects. Lets choose the also new
Polygonal Loop object for them. To better distinguish them,
I'll color one blue and one red. Of course, both could also
have the same color.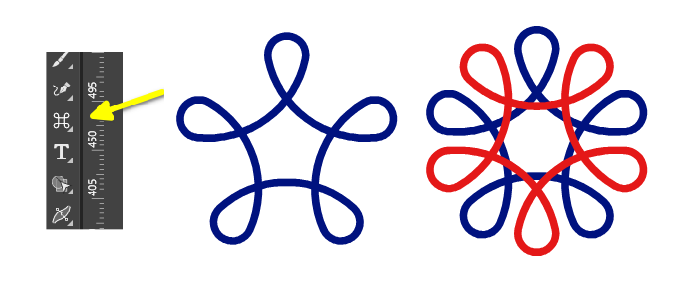
.
.
Now, we need to use a suitable line weight. Take a slightly
thicker line weight. You'll see why in a moment. I keep the
originals by creating a copy of both objects in case I change
my mind about some design decisions.
.
.
Expand the outline, this results in two shape objects. Add a outline to
both in the color of the background. In our case, the color white.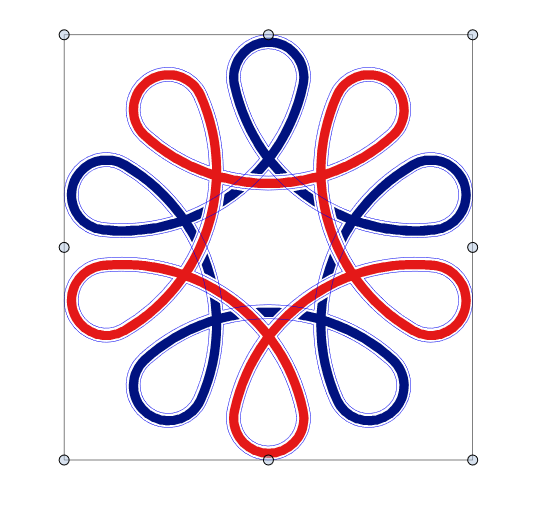
.
.
.
.
Intertwine themYou have two possible ways to do this.
Both ways require to select your objects first.
.
.
First way
Use Menu > Styles > Intertwine > Create Intertwine Group
and then select the Intertwine Tool to place your Intertwines.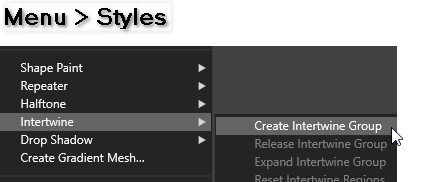
.
.
Second way
Use the Intertwine Tool directly. Select the Intertwine Tool, click onto the
Objects a Dialog appears "Create Intertwine Group" confirm this and you
can continue to place your Intertwines.
.
.
.
Placing the IntertwinesOne click with the Intertwine tool place the Intertwine.
Another click toggles between the two possible states.In our example, either part of the blue object or part
of the red object is raised. To confirm a state click
once elsewhere.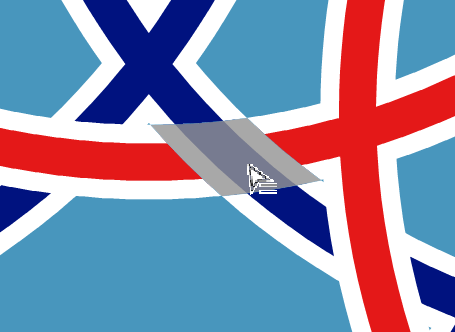
.
.
.
As you can see, both the shape and the outline are raised.
Since the outline color and the background color are identical,
it looks like gaps.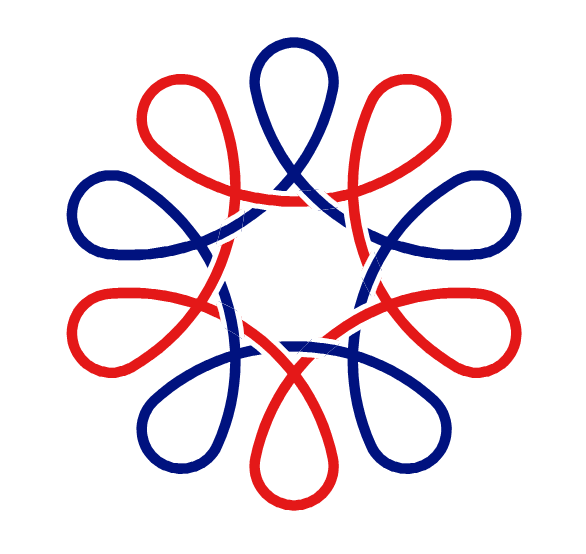
.
.
Those are the basics. But with the Intertwine tool
and some other features of VS, I can tell you that
there's a lot to discover.")
I post a few things i found in a later post.
Will take some time.Of course everyone is welcome to post here too
if they have found something nice.Have fun being creative.
-
@Subpath thanks for this nice tutorial. Will try it when I find the time
-
As i wrote there a some possibilities to discover.
Here some findsLet start
A simple rectangle
round the corners a bit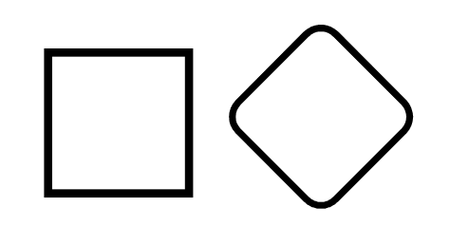
.
.
create a simple blend with it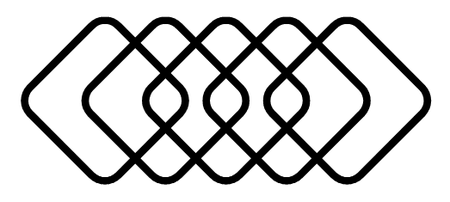
.
.
a easy way to give it a more sophisticated look
is using Stripes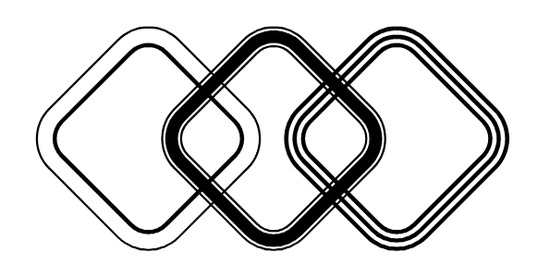
.
.
its no problem using stripes with
the intertwine tool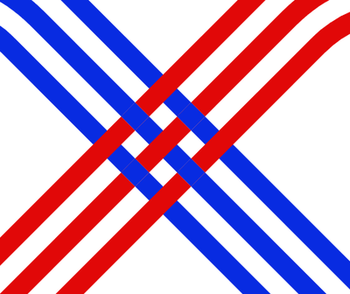
.
.
by using the same way i descripted above
to fake gaps you get this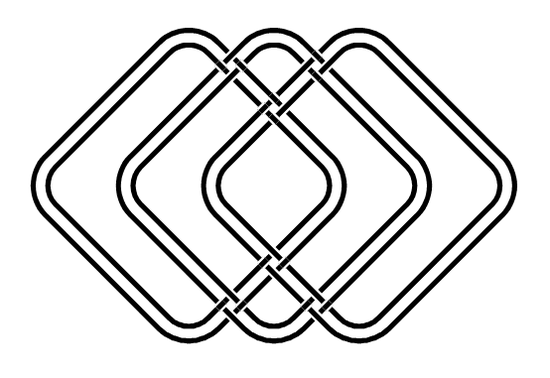
.
.
.
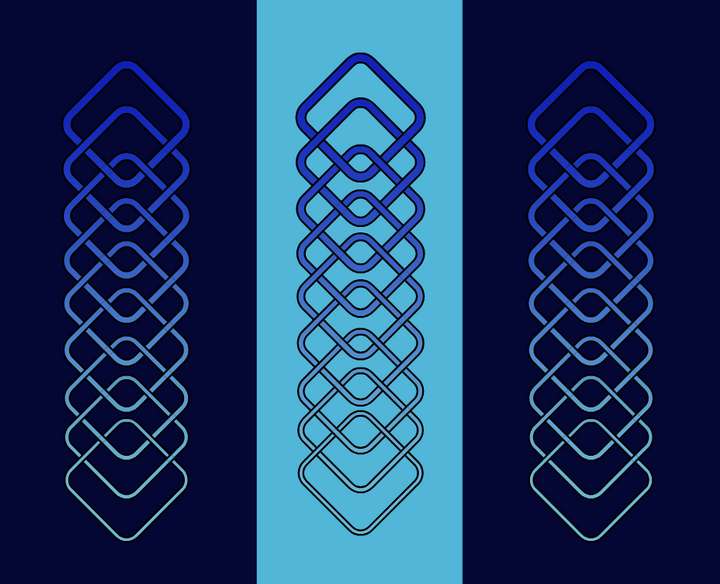
here a result of mineyou need to be a bit tricky to get the that gradient
from Object to ObjectCreate a gradient > Rasterize the Object (convert it into an image)
and do a "Intersect" Boolean on all objects with the desired
spacing between them.arrange them back then and do the "Intertwine"
-
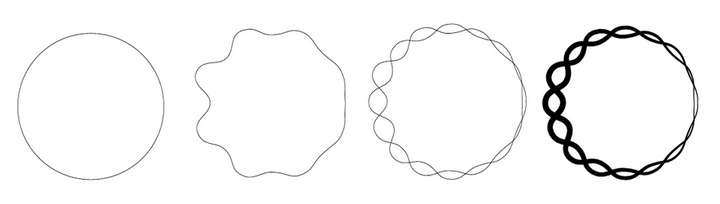
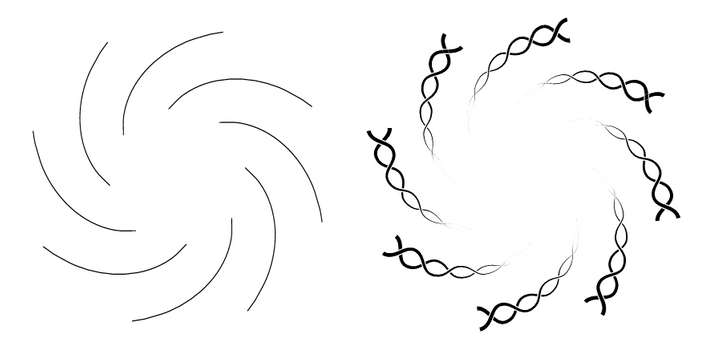
Easy way to create a pattern for use with the Intertwine tool
One feature in "VS" that allows you to create patterns for the Intertwine Tool
is the "Outline ZigZag" Shape Effect. Especially the "Wave" Mode of this effect.
This Shape Effect can be applied to many shapes, I recommend to use round
or rounded shapes with it.
.
.
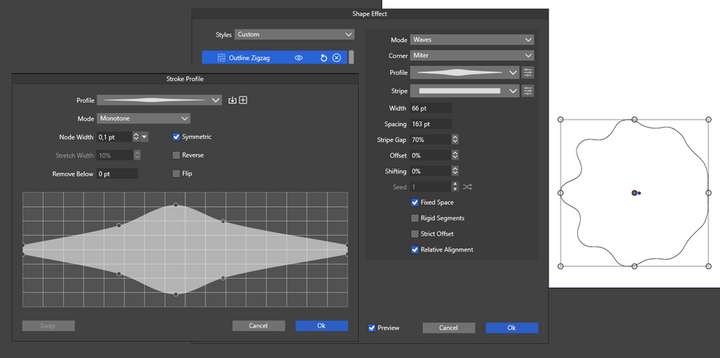
Here the basic steps for that way.Lets create a simple Line.
Then apply the "Outline ZigZag" shape effect to it.
Set Mode to “Wave”. Width to 45 and spacing to 75.
You find that Shape Effect here:
Effects > Outline > Outline ZigZag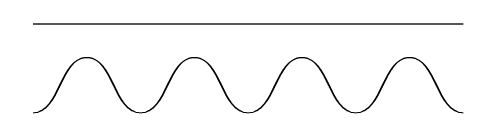
.
.
Create a copy of this object, select it, switch to the Node Tool and select
"Reverse the direction of the selected Path" in the contex panel. This
changes the path direction and effectively reversing the shape effect.
.
.
Now select both objects and center them and you have the basic Pattern.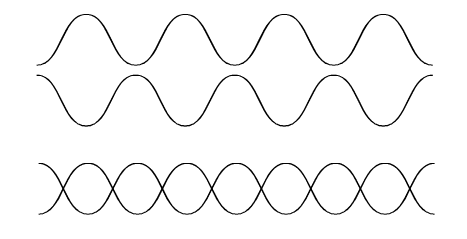
.
.
You could also apply a Profil to the Stroke
before using the Intertwine Tool of course.
-
.
.
The Profil Setting in the "Outline Zigzag" Shape EffectIf you notice that the "Outline Zigzag" Shape Effect has a setting
called "Profile", you might be confused, as I was at first glance.However, instead of changing the stroke thickness, the Profile setting
for the "Outline Zigzag" Shape Effect affects the wave pattern. You
can use it to define the length of the wave pattern and fade the effect
in and out.This setting is another interesting way to further customize the pattern
described above. But the "Standard" Stroke Profil option is still useful.Here some examples

.
.
Create your own Profil works the same as with Stroke Profil
.
.
.
.
Using the “Shape Effect” Picker Tool its a very easy way to transfer the
"Outline ZigZag" shape Effect to different Shapes.
.
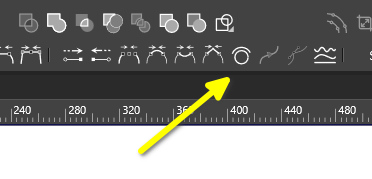
Select your shape then the Shape Effect picker and choose the Shape
where to pick the Shape effect from.
.
.
.
.
.
Thats all. Have a nice day and fun being creative. -
@Subpath said in Intertwine Feature and a way to fake gaps:
If you notice that the "Outline Zigzag" Shape Effect has a setting
called "Profile"I did not, but now I like it. Thanks for highlighting it
-

I didn't notice it at first either.
The crazy thing was.
I was looking a long time for something like this
and tried some crazy workarounds to get something similar.Then I tried this profile setting and realized
it was exactly what I was looking for ...