Exporting SVG's for Cricut machines doesn't work
-
I don't know where the problem is, but SVG files created with VS are not visible in the software bundled with Cricut machine. The same file opened in AD and saved without modifications works. I don't know which side is the problem, but I have tried all the options in VS and unfortunately they cannot be imported correctly.
-
@encart Maybe checking the 'Vector Text' option (which converts editable text to curves) helps?
-
@b77 Checked & unchecked all options already. Doesn't find right way yet. My test-project is just a random rectangle. Exported whole canvas, artboard only, and selection. I also have in mind that the Cricut program is not perfect. However, exporting SVG from other applications works
-
@encart No idea if this can help (I'm not a/the developer), but maybe running the generated SVG through an online SVG optimizer could make it work?
-
@b77 said in Exporting SVG's for Cricut machines doesn't work:
SVG optimizer
Yes, it works after optimizer. So probably there are some parameters saved in file. Thanks
Here is what I found on Cricut website.
Pattern Fills - .svg or .dxf files cannot contain pattern fills when exported for Cricut Design Space image upload.
Explanation – Pattern fills are fills on shapes that are anything other than flat colors. Color gradients, textures, patterns, images, and photographs are all examples. This prevents Cricut Design Space from separating your shapes into different layers based on the color.
Solution – Export your file as a .jpg, .bmp, .gif or .png. This will enable you to upload the shape to Cricut Design Space. The file will not be layered into individual colors like a vector file (.svg or .dxf). It will come through as a single layered object which can then be printed on a home printer and cut out with the Cricut Machine using Print then Cut.
Clipping Paths - .svg or .dxf files cannot contain clipping paths when exported for Cricut Design Space image upload.
Explanation – Clipping paths are multiple shapes layered together so that one shape masks or clips the other shapes. Imagine a circle masking out a piece of a square to create a new shape like a jigsaw piece. Since your jigsaw piece is actually a few shapes overlapping one another, Cricut Design Space can’t make sense of it when you go to upload it.
Solution One – If the desired end result is filled with a flat color, use the tools within your preferred design program to flatten the image into one shape. By merging the multiple shapes into one form you will be able to upload it successfully as a .svg or .dxf without changing your design.
In Adobe Illustrator you can convert clipping paths into single shapes with the tools in the Pathfinder panel.
In CorelDraw, the PowerClip feature is only used for shapes that overlap images or bitmap files. In this case, you will not be able to flatten everything into a single shape with a basic fill. See Solution Two below for an alternative solution.
Solution Two – If you are using a clipping mask over an image, a photograph or over any shape that is not filled with a flat color: Export your file as a .jpg, .bmp, .gif or .png. This will enable you to upload the shape to Cricut Design Space. The file will not be layered into individual colors like a vector file (.svg or .dxf). It will come through as a single-layered object which will can then be printed on a home printer and cut out with the Cricut Machine using Print then Cut.
Text - .svg or .dxf files cannot contain editable text when exported for Cricut Design Space image upload.
Explanation – Text needs to be converted into a shape before it is sent to Cricut Design Space.
Solution – Before you export your file, convert the text by selecting it and using Create Outlines in Adobe Illustrator or Convert to Curves in Corel Draw. This will turn the editable text into a set of shapes without changing the way they look. You can now export your work as a .svg or .dxf file.
Linked Images - .svg or .dxf files cannot contain linked images when exported for Cricut Design Space image upload.
Explanation – Linked images are images that are not embedded within your file. The file contains links to images that are stored in other places (this keeps the file size small). Cricut Design Space can’t read those linked files when you try to upload the image.
Solution One – Embed the images in your file. This works only if you’ve linked in other .svg or .dxf files. In the Links panel in Adobe Illustrator using the Embed Image(s) tool, and in the Links panel of CorelDraw Unlink an image or use the Break Link tool. This will remove the external link and combine the files into one. You can now export your work as a .svg or .dxf file.
Solution Two – Export your file as a .jpg, .bmp, .gif or .png. This will enable you to upload the image to Cricut Design Space. The file will not be layered into individual colors like a vector file (.svg or .dxf). It will come through as a single-layered object which can then be printed on a home printer and cut out with the Cricut Machine using Print then Cut. Use this method if you have linked in images in any format other than .svg and .dxf.
Embedded Unsupported Images - .svg or .dxf files cannot contain non-vector files for Cricut Design Space image upload.
Explanation – .svg and .dxf files are vector formats and Cricut Design Space uses these to create cut files that separate your designs into layers based on color. When your file contains images, photographs or gradients Cricut Design Space can no longer create a file with a separate layer for each shape and color.
Solution – Export your file as a .jpg, .bmp, .gif or .png. This will enable you to upload the shape to Cricut Design Space. The file will not be layered into individual colors like a vector file (.svg or .dxf). It will come through as a single-layered object which can then be printed on a home printer and cut out with the Cricut Machine using Print then Cut.Maybe it will help dev. to add some advanced export options for devices like Cricut
MacBook Air M4 24Gb, Tahoe 26.3.1
-
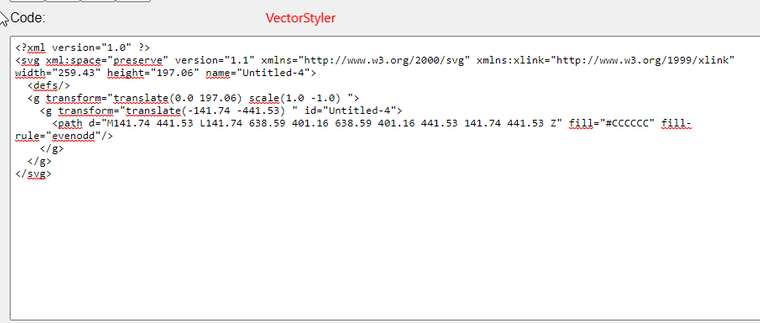
That is the code of file crated in VectorStyler
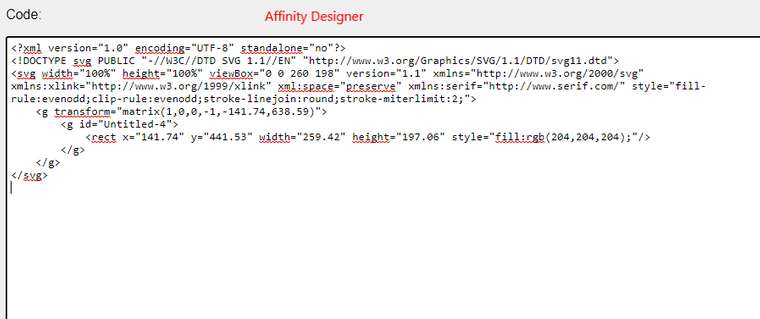
Here is code of the same file but saved as a new file in AD
I deleted '<defs/>' tag and all between '<g>' from svg file and it is recognized by Cricut. Im sure that i deleted some important data but just want to share with my discover.
MacBook Air M4 24Gb, Tahoe 26.3.1
-
@encart I add this to the backlog as a bug.
-
@encart The new build (1.0.022), adds the DTD tag for SVG export. Try again and let me know if the cricut software can accept it now.
-
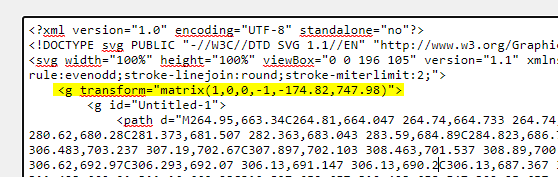
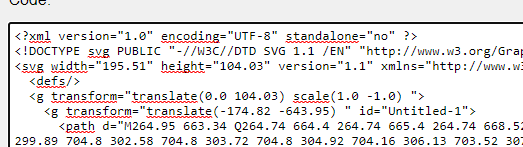
@vectoradmin Hi, I tested that point right after your release, but i have forgot to write you feedback. Now I have a bit of time. It doesn't help. My knowlege about xml is somewhere 5cm above the ground level, so I just started swapping tags one by one. The reason why Cricut Design software is rejecting output file from VS are parameters in first <g> tag.
Designer:
VectorStyler
After removing 'scale' param. it appear but flipped vertically.
Than I swap whole line from Affinity designer file and works properly, but I coud not import it to VectorStyler again.Maybe that will help you a bit. Let me know when you need me. I'll keep an eye on it.
MacBook Air M4 24Gb, Tahoe 26.3.1
-
@encart Yes, VS has to flip everything as it uses bottom up coordinates (cartesian coordinates). I will think of a solution, where the SVG coordinates are directly converted without a flipping group.
-
@encart In build 1.0.025 the flipping SVG transform is merged into a single transform as it was shown in the working example. Let me know if there are still issues.
-
@vectoradmin YES!
 Works flawlessly. Thank you very much.
Have a question related to this topic.
I'am not sure if it's only my problem, but when I export SVG file i have to keep in mind to add .svg extension after the name. Otherwise file has unknown format icon and is unrelated with any software. Similar problem as we had with workspace file. -
@encart Will fix the extension issue. Is this on Windows?
-
@vectoradmin Yes, I'am using Windows.
-
I am creating an a simple design to use for my Cricut machine. I would like to export this as an SVG so it keeps all the layers. I found this tutorial and wasn't able to get the same results when using my own design. It works perfectly if I create a box and text just like in the video, but my design does not include text.
I have taken two shapes and merged them together by first grouping them and then rasertizing them. I then made a new layer with a new shape on top of the raserized shape and then grouped those together. Then I followed the same steps as in the video and have not been able to get it to work in Cricut. I'm not entirely certain the way I'm exporting is correct.
Is there a better way to merge shapes in Affinity Design than the way I described above?
Is the fact that I have a rasterized image the source of my problem?
If anyone is familiar enough with AD for Mac and using it in conjunction with Cricut I could use your help. https://www.craftyhangouts.com/cricut-for-making-shirts/
I'm not a designer and I'm just attempting my first forays into using this program for simple Cricut designs. -
@Annieclover2 Have you tried the steps in the tutorial without rasterizing?
And can you post a link to the tutorial or the specific video you mention so we can get an idea about what the issue could be?Also: the Cricut machines only cut material or they also print then cut?
-
@b77 the Cricut machines will only cut, but the software has a feature to print things to your printer first, then there are ways to calibrate the Cricut to the printout to cut things out from what was printed.
-
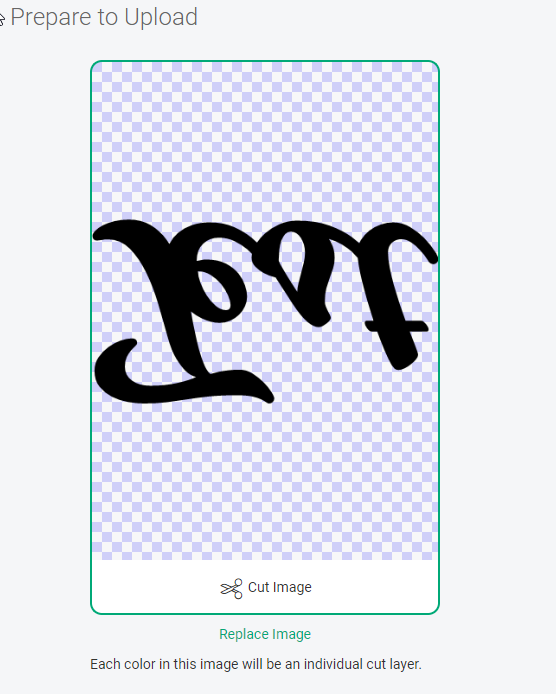
@Annieclover2 I'm not sure why you want to rasterize your project. If you want to use Print &Cut feature than rasterize it and save as PNG with transparent background. But If you want to cut it , than do not rasterize, save it as SVG file and import to Cricut Design. I'm sure I can help you.
Edit: If you export your project in that way, than you should have no problems. You will still be able to move elements relative to each other, change their color, size, etc.
https://recordit.co/GtzFPPmaJN -
Try reading the Cricut help pages - https://help.cricut.com/hc/en-us/articles/360009553213-Image-uploads-unsupported-items