Noise Editor
Use the Noise Editor to fine-tune a noise style. Adjust individual settings directly or randomize selected settings to explore variations.
You can also save noise as a style or preset. When exploring random variations, choose which settings can change and which stay fixed.
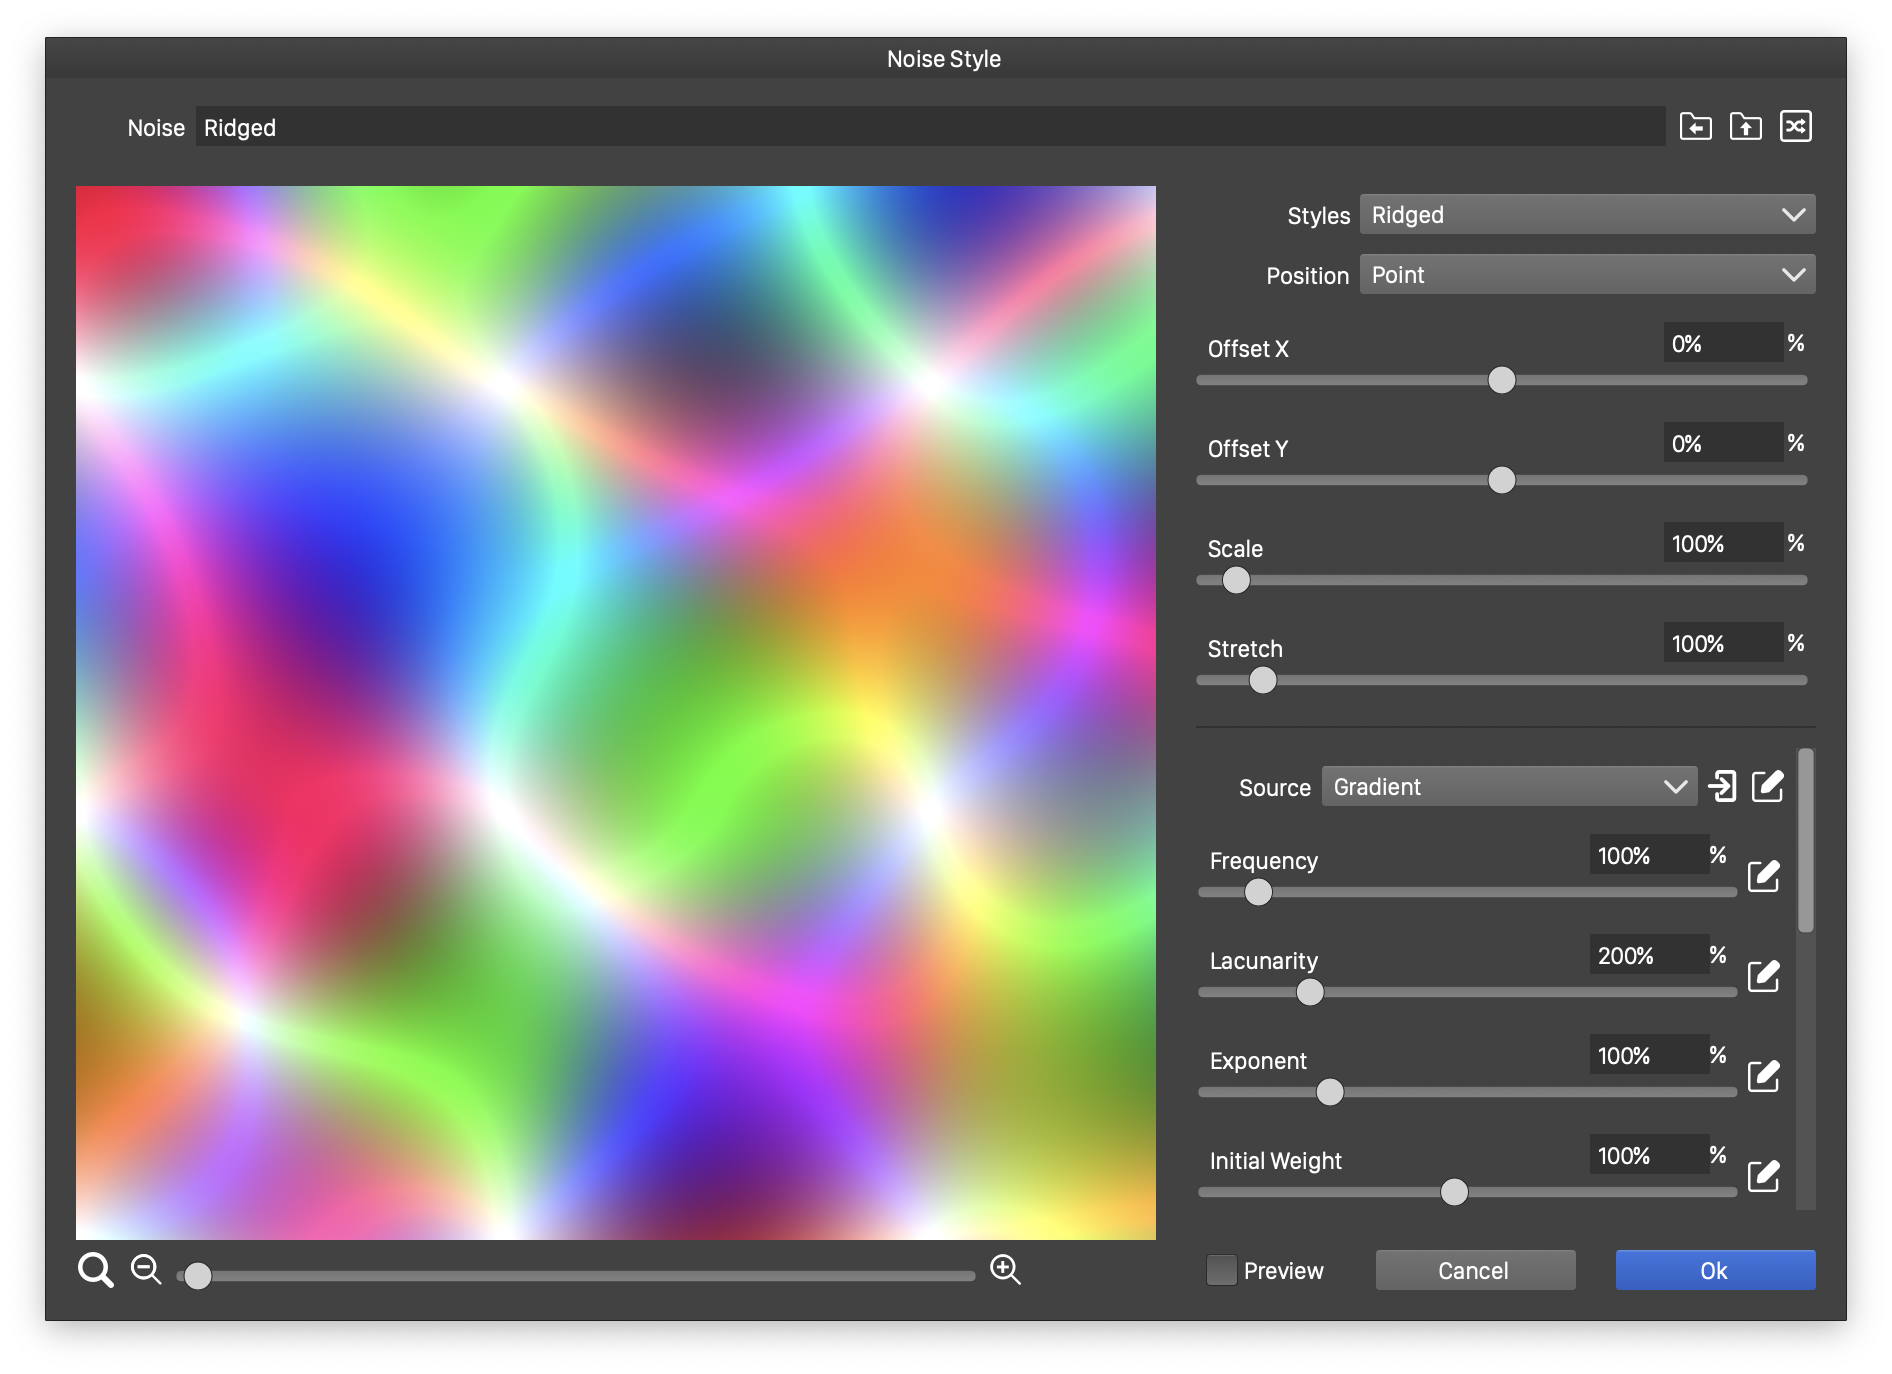
The Noise Editor.
The Noise Editor also opens when you click the edit button for a noise style or preset in its panel. When editing a style or preset, use the Name field to change its name.
Each noise type has its own settings. Hover over a setting’s field to see a short description.
Settings appear to the right of the preview. Common settings, such as the region offset and scale, appear first, followed by settings for the selected noise type.
Noise Preview
The large preview lets you explore different regions of the noise. Depending on the noise type and settings, these regions can differ without repeating. Choosing a region is another way to control the appearance of a fill or effect.
Use these controls to explore the preview:
- Pan across the preview with the mouse, or click and drag, to explore different regions.
- Double-click inside the preview to use the current offset. This updates the Offset X and Offset Y fields.
 - Zoom out.
 - Zoom in.
 - Set the zoom level to 100%.
- View or edit the zoom level in the number field next to .
- Drag the slider between and to adjust the zoom.
Common Attributes
Use the common settings to choose a noise type and control its visible region:
- Styles - Choose an existing noise style, preset, or predefined noise type. This menu also contains these commands:
- Browse Styles - Explore noise in the Noise Browser.
- Create Style - Save the current noise as a document style.
- Create Preset - Save the current noise as a preset.
- Position - Choose how the noise is positioned and scaled:
- Fixed - Position the noise in absolute canvas coordinates. The visible noise depends on the object’s position. Objects with the same noise style and settings share a seamless pattern.
- Relative - Position and scale the noise relative to the object’s size, so its frequency changes with that size.
- Point - Position the noise relative to the object, while keeping its frequency in absolute units.
- Offset X and Offset Y - Shift the visible noise region horizontally and vertically.
- Scale - Scale the visible noise region uniformly.
- Stretch - Stretch the noise vertically.
Creating Styles or Presets
Save the current noise as a style or preset using the Styles menu:
- Styles stay linked to their uses. Editing a noise style updates every use of that style, making it easier to change the same noise throughout a document.
- To create a style, choose Create Style from the Styles menu. Enter a name in the dialog and confirm. The new style appears in the Styles list.
- Presets provide a starting point without a link. Changing a preset does not affect noise you have already applied from it. Organize presets into custom groups to copy or share them with others.
- To create a preset, choose Create Preset from the Styles menu. Select a group, enter a name, and confirm. The new preset is stored in that group and appears in the Styles list.
Random Selection
Create random variations of the current noise while keeping selected settings fixed:
- Use the button beside each setting for the noise type to enable or disable randomization:
 indicates that the setting can change.
 indicates that the setting stays fixed.
- Click
 to generate a new variation. Only settings with randomization enabled will change.
These choices are saved with the noise. The Noise Browser also uses them when generating variations of a noise style or preset.
Source Noise
Some noise types use another noise as their starting point. For these types, choose the source in the Source field, which appears first among the settings for that noise type.
- A source can have its own source, allowing you to combine noise types in nested levels.
 - Edit the source noise’s settings.
 - Return to the parent noise, one level up.
 - Return to the root noise at the top level.


