1-- Testing Symbol Distribution Inside Typography — From Pattern Fills to Repeaters
-
Good morning,
My English is not very good, so I will try to explain this process as clearly as possible.
First of all, this was not an instant solution. I would like to share the entire process, including the different attempts, references, links, and ideas that did not work, because they were also part of the path that eventually led me to a solution.
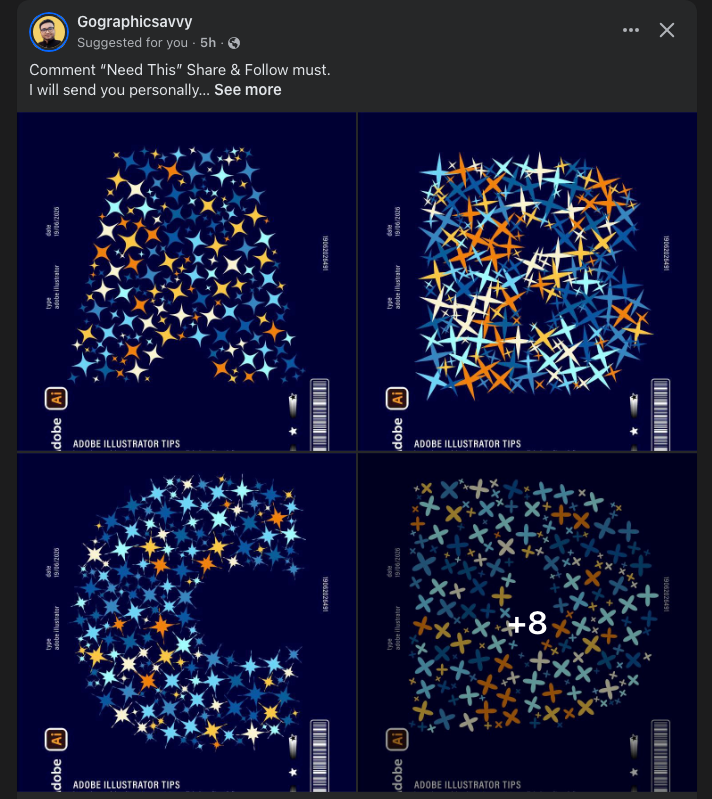
My goal was to create a letter built from repeated symbol instances arranged on a regular grid, similar to modular typography or dot-matrix style lettering. However, I wanted all symbols to remain complete, without being clipped by the shape boundaries.
At first, I explored Pattern Brushes, Scatter Brushes, Pattern Fills, and Clipping Masks. All of them seemed close to what I needed, but each one had an important limitation: symbols were either clipped at the edges or distributed in a way that was not completely uniform.
During this search, I found several discussions and tutorials that influenced my approach, even when they did not provide the final solution. I think documenting those failed attempts may be useful for anyone facing a similar problem.

The concept itself is simple. This type of logo can be created manually using Pathfinder operations: build a grid of circles, place the desired shape on top, and remove the circles that are not needed.
In fact, if the goal is to create a final logo with complete artistic control, this manual workflow is probably the best option. It allows for adjustments, corrections, and custom decisions that make the result more unique.
If I needed precise spacing and alignment, I would probably build the grid using blends, as they provide a very accurate and editable way to generate evenly distributed objects.
However, that was not the objective of my search.
My question was different:
"Is it possible to automatically generate this kind of circle-based effect inside any typography or shape of my choice?"
This is where the problem became more complicated.
As soon as the goal shifted from creating a single logo manually to finding a reusable workflow that could work with any letterform, many limitations began to appear.
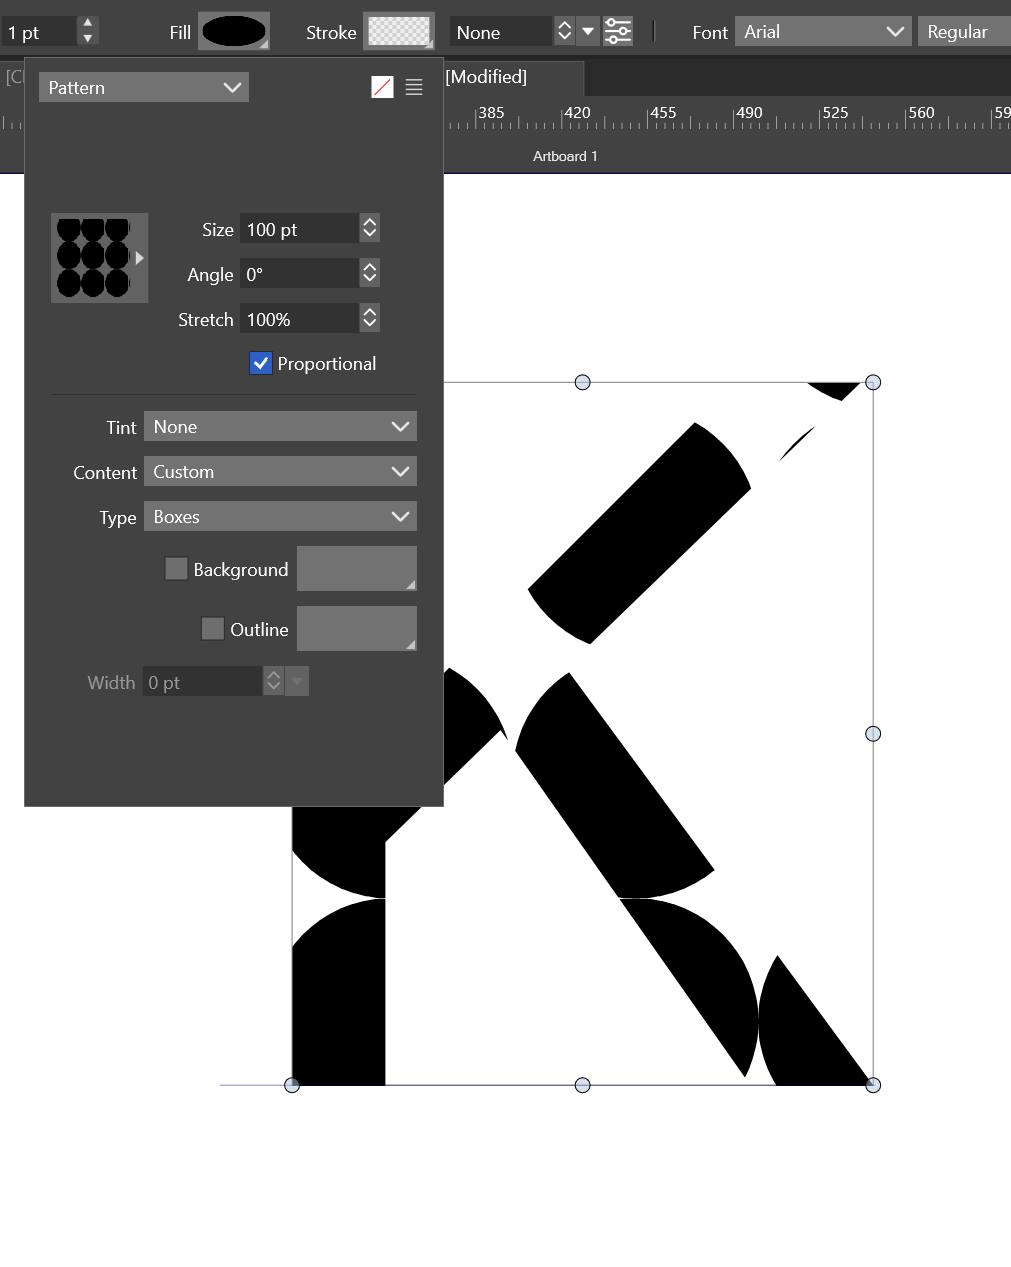
My first thought was that Pattern Brushes might be the solution, and for a moment it seemed promising. They came surprisingly close to the desired result.
However, it was still limited.
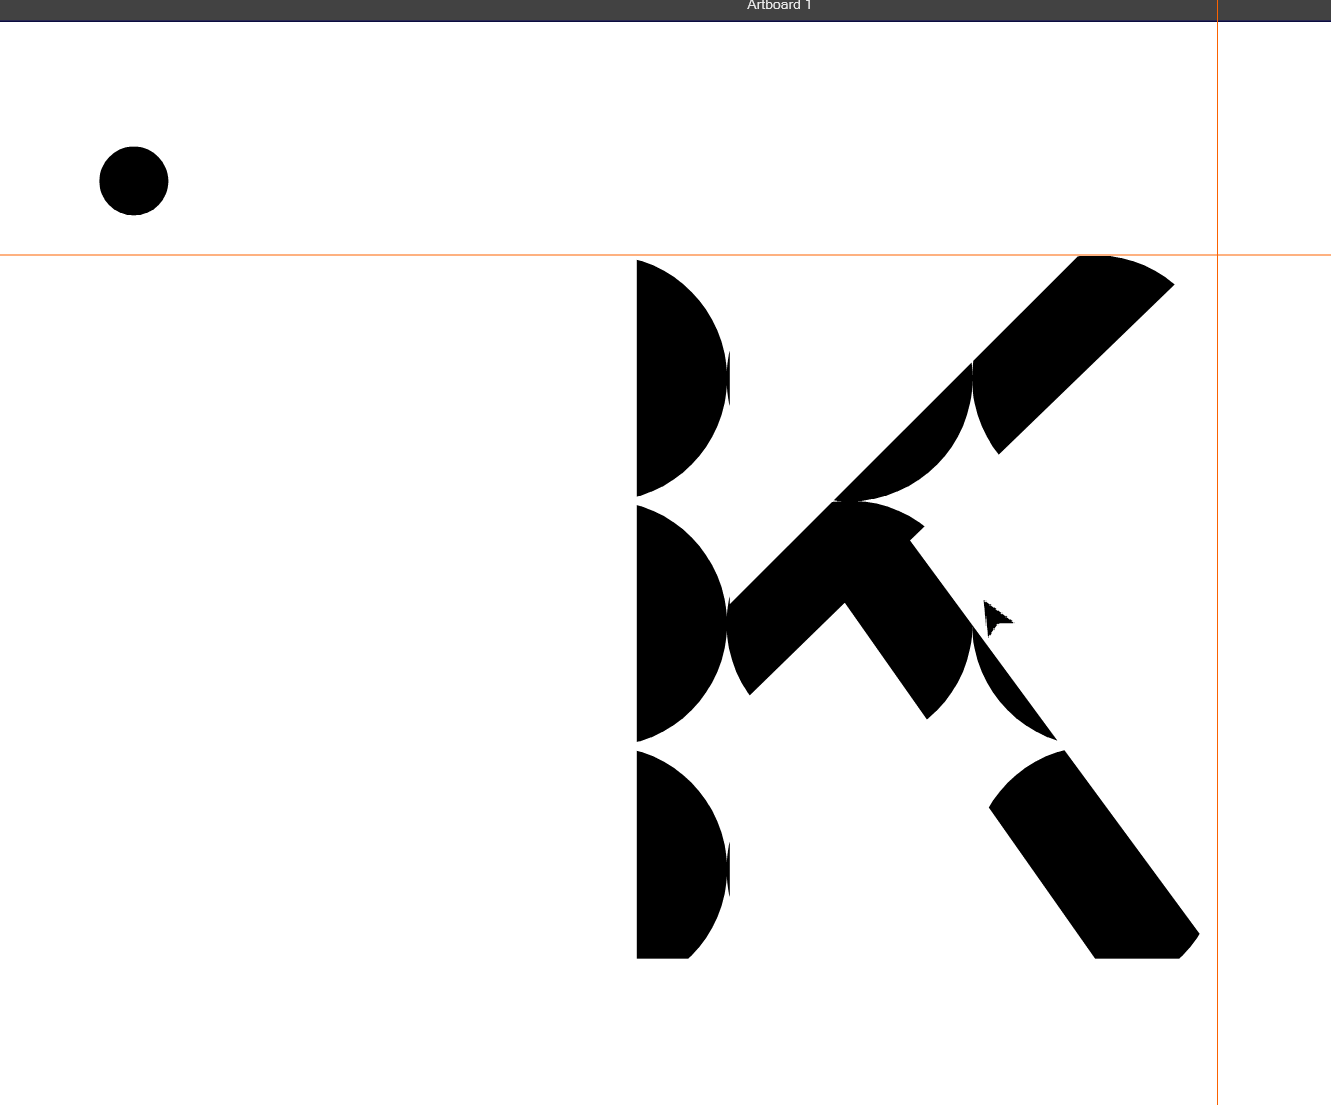
The result was only visually confined to the interior of the shape. The circles were not actually being recalculated based on the geometry of the letter.
Instead, the pattern was simply clipped by the boundaries of the object. Any circles that crossed the edge were cut off, rather than being removed or repositioned.
What I was looking for was a shape-aware distribution system: a way for the software to determine which circles could fit entirely within the shape and keep only those instances.
In other words, I wasn't looking for a clipped pattern. I was looking for a solution where the symbols were fully contained within the shape, with the distribution being recalculated according to the available space and the boundaries of the letterform.
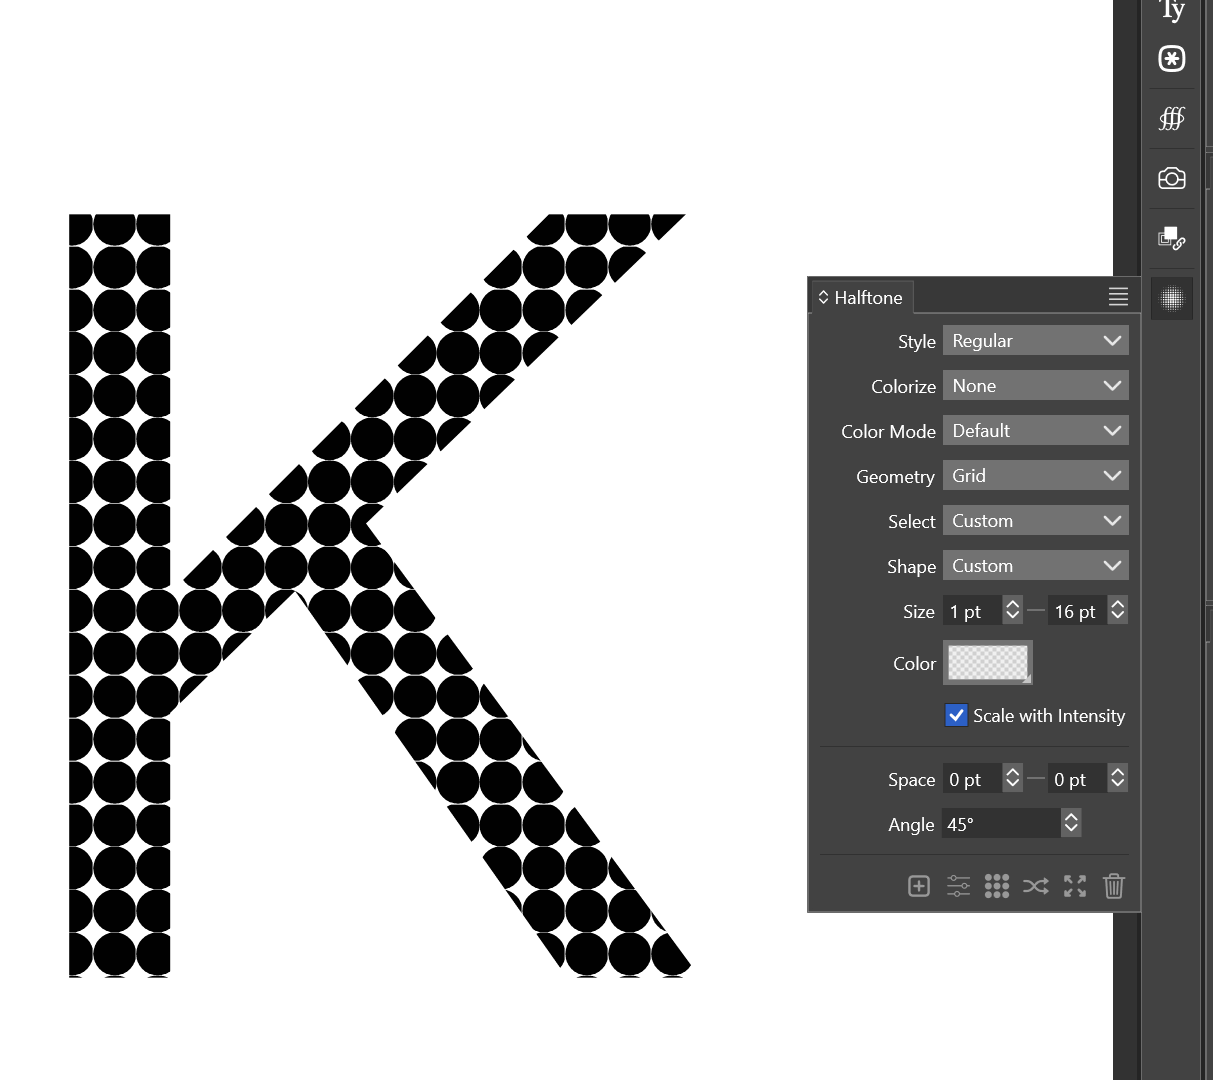
Then I thought about using a halftone-based approach.
At first, it seemed like a promising direction, since halftones are specifically designed to generate regular patterns of dots within a shape.
Unfortunately, I ran into the same limitation.
So I moved on to the next idea: searching through old Illustrator forum discussions.
During that search I found an interesting article. The website's certificate appears to be expired due to its age, so I cannot really recommend visiting it directly unless you know what to expect. However, for reference, this was the link:
~~http://www.vektorgarten.de/align-and-distribute-pathfinder.html~~
The topic was discussed on the Adobe forum: https://community.adobe.com/questions-652/patterns-not-cropped-by-shape-825385I mention these links because they are closely related to the problem I was trying to solve. However, neither of them provided the solution I was actually looking for.
The Vektorgarten article was particularly interesting because it demonstrated a clever Pathfinder workflow for removing unwanted objects from a grid. In other words, it offered a way to manually construct this kind of effect while avoiding some of the clipping issues.
However, it was still fundamentally a manual workflow. It did not provide a way to automatically recalculate the distribution of symbols inside an arbitrary shape or letterform. The result still depended on creating a grid first and then removing what was not needed.
While this is perfectly valid for creating a custom logo, it was not the reusable, shape-aware solution I was searching for.
The VectorStyler forum did not give me much hope during my search either.
Thanks, @boldline, for always opening these topics. I often end up finding one of your threads during my searches, and they are usually very helpful.
- @Boldline It is not possible to do this at this time. But maybe using the hexagonal tiling mode, and a tile containing the large and a few smaller versions of those leaves could be close to this result.
In this case, the answer I found was not particularly encouraging. On one hand, it confirmed that the feature was not possible at the time. On the other hand, it suggested an alternative approach that could work for that specific example.
What I found interesting is that the proposed solution was still based on tiling and pattern construction, rather than on a shape-aware distribution system that could automatically determine which objects fit entirely within a shape.
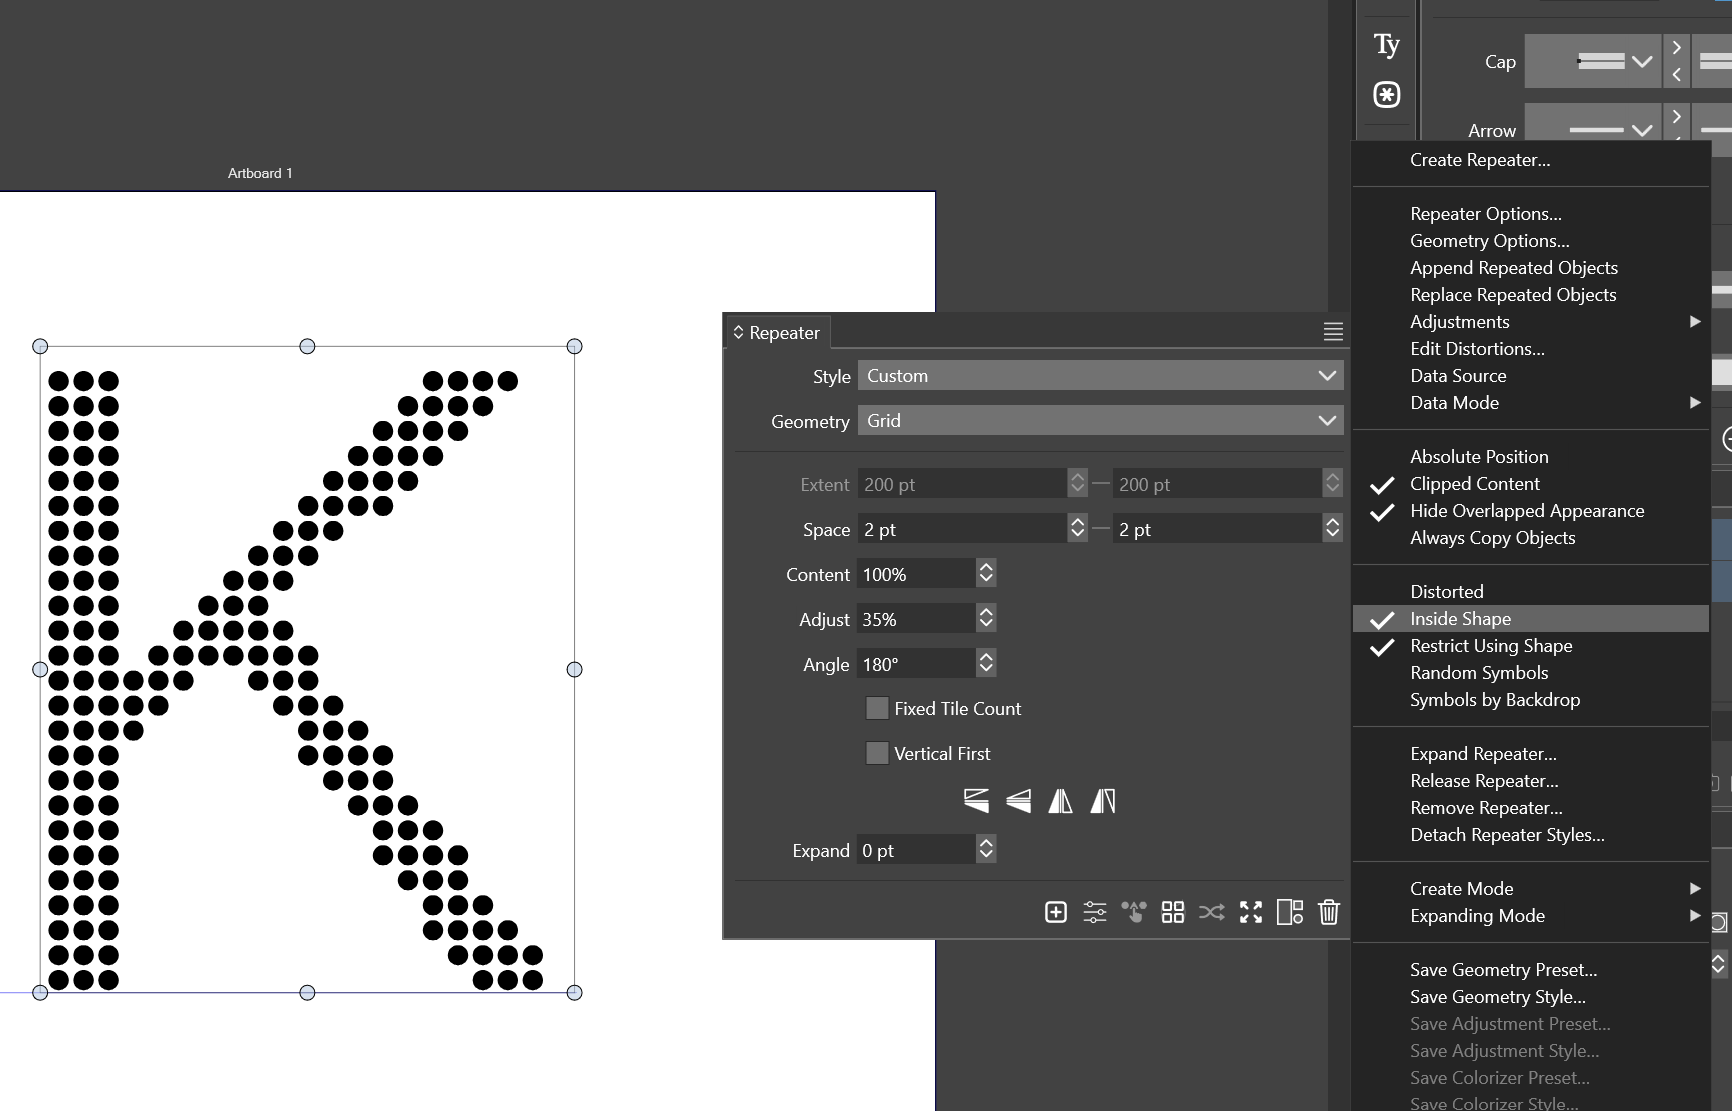
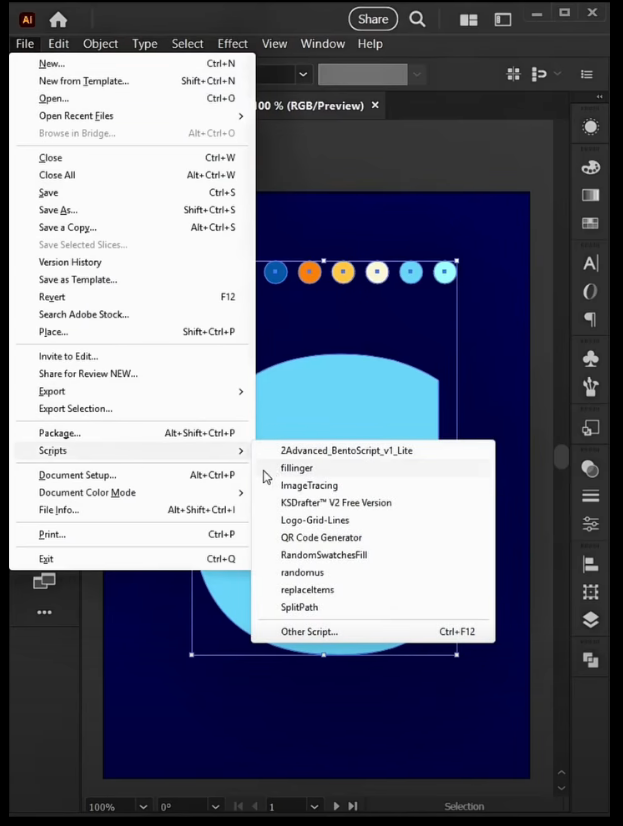
This finally led me to the solution I had been looking for: using a Repeater with the "Inside Shape" option enabled.
Unlike the previous approaches, this method distributes the instances according to the boundaries of the shape itself. The spacing can be adjusted independently on the X and Y axes, making it possible to create a regular grid of objects while keeping the workflow fully editable.
For my use case, this was the closest solution to the original goal: generating a reusable circle-based or symbol-based effect inside arbitrary typography without relying on clipping masks, pattern brushes, or manual Pathfinder cleanup.
Thank you for reading this far.
I'm happy that I was able to complete this small challenge, and I decided to share the process in case it might be useful to someone else in the future.
A big thank you to the community for all the inspiration along the way. Some of the ideas in this post would never have crossed my mind without your discussions.A little kiss from Spain.
-
@Clippy-notes Thank you! I’ve learned a lot from other people’s posts here over time, so I’m glad if something I shared was useful in return.
I like the way you documented the full process here and not just the final answer. The key distinction is that this was never just a clipped-pattern issue. It was a shape-aware distribution issue, and Repeaters with Inside Shape seems like the best solution.
I also appreciate that you showed the failed approaches. That makes the post more useful, because it explains why pattern fills, clipping masks, scatter brushes, and halftones only get part of the way there.
Nice job with this. It will probably save other users a lot of trial and error who run into the same problem later.
After I had read through your informative post, I came across this related solution in a facebook reel.
This is the same kind of result I was looking for in my original post you had referenced. (It would be nice to allow for fixed size and variable results). I'm looking forward to when scripting is added to VS because that would open up possibilities such as this example without the developer needing to add all options himself.
-
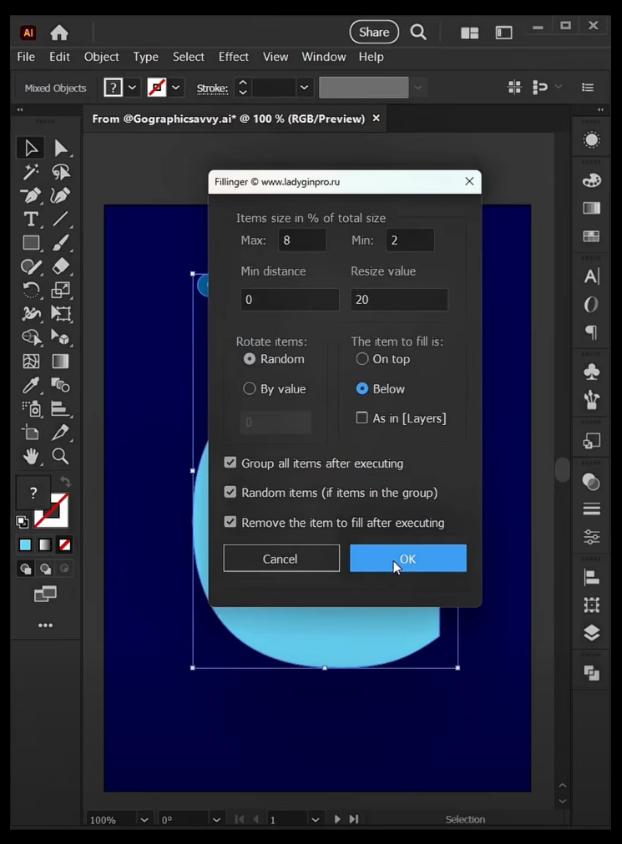
@Boldline I also tried looking into Fillinger script, but I’m not sure if there’s any way to add scripts to VectorStyler.
Regarding Fillinger, the repeater already includes all those features in the advanced settings, and in the three-line mode you can add a randomizer method. In the documentation, I believe it said you need to group the objects first and then apply the repeater.
I might try to replicate it; it looks cool.