
Blend Tools
Blend effects can be interactively created and adjusted using the two blend tools found in the application toolbox.
The Blend Tool
The Blend  tool is used to:
- Interactively create new blend effects between objects.
- Adjust the position of source objects along the blend path.
- Extract single intermediary objects from the blend as separate source objects.
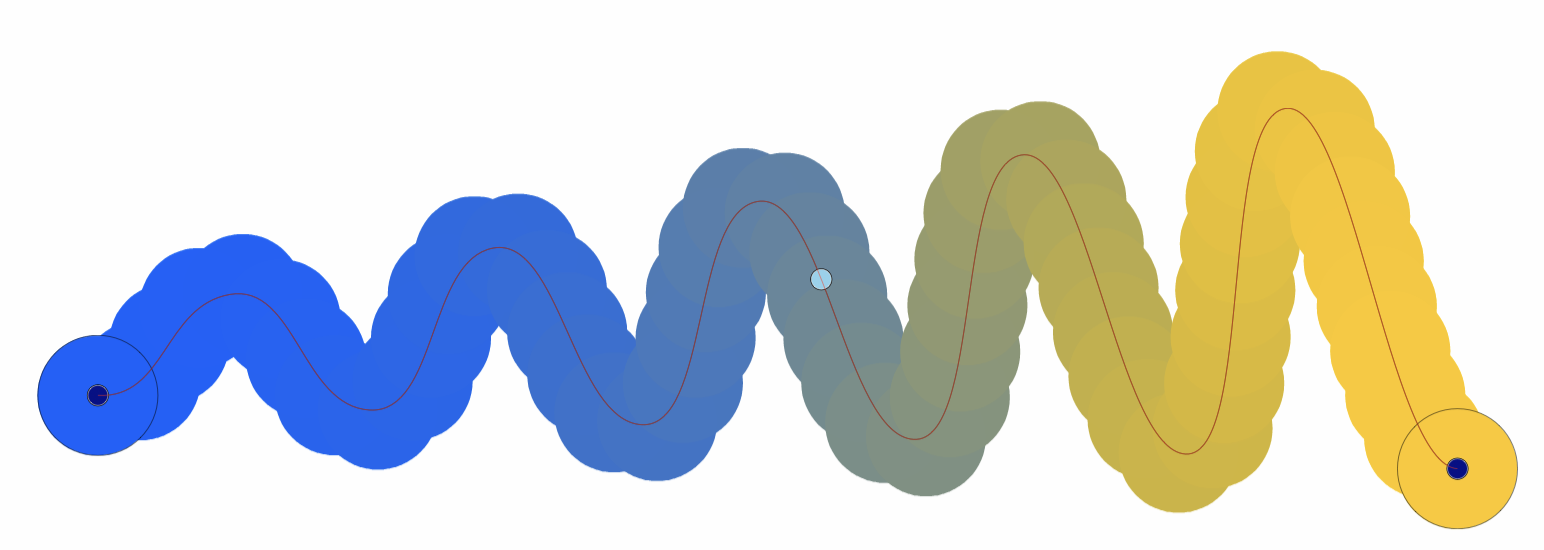
The blend effect editor tool, indicating a position of intermediary object extraction.
To create a new blend effect between two objects:
- Select the Blend tool.
- Click on the first object of the blend.
- The click on the second object of the blend.
- A new blend effect is created between the two objects.
When a blend effect is aligned along a path, the position of the source and target objects can be adjusted:
- Select the Blend tool.
- Select the blend effect with the blend tool, by clicking on an intermediary object.
- The blend path used in the effect is shown.
- The object positions are indicated using dark blue handles shown at the center of the source and target objects.
- Drag the handles from the object center along the path. It is important to stay close to the path to find a new location for the object.
The intermediary objects of a blend effect are generated automatically, as the blend effect options are adjusted.
The Blend tool can be used to separate an intermediary object at a position of the blend. This will create a new object and two blend objects connecting it to the original source and target objects.
- Select the Blend tool.
- Hover over the blend path or the center line of the blend.
- A light blue node is shown indicating the detected blend position.
- Double click at the selected position, to separate the blend into two blend effects.
- Hold the Command (Mac) or Control (Windows) key and double click, to extract an intermediary object into a new object, without modifying the blend object.
Blend Mapping
The Blend Mapping  tool is used to map locations between the shapes of the two end objects in a blend effect.
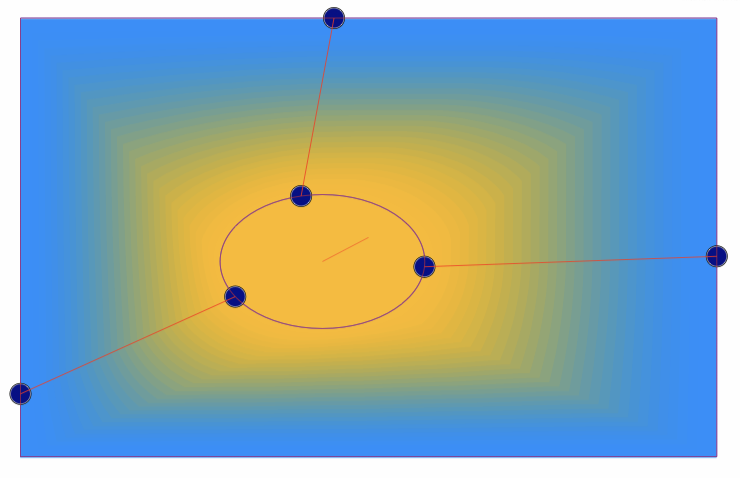
The blend mapping editor tool, creating a mapping of locations between a rectangle and an ellipse.
When the shapes of two objects are transitioned, the blend effect will create a default mapping of the locations on source shape to locations on the target shape. This depends on the state of the Weighted option, and on the actual geometry of the shapes.
To customize the mapping of the shape locations:
- Select the Blend Mapping tool from the application toolbox. This tool can be found in the same group as the Blend tool.
- Hover over the shape of the source or target object.
- A light blue handle is shown on each shape, connected with a line, indicating the default mapping at that location.
- Double click at a shape location to create a new mapping pair using the default mapping.
- A user created mapping pair is shown with dark blue handles connected by a red line.
- Drag the handles along the one of the shapes (staying close to the shape), to adjust the position of the mapping pair on the shape.
- Multiple mapping pairs can be created by double clicking on locations of the shape without a mapping node.
- To remove a mapping pair, drag the handle away from the shape.