Stroke Caps
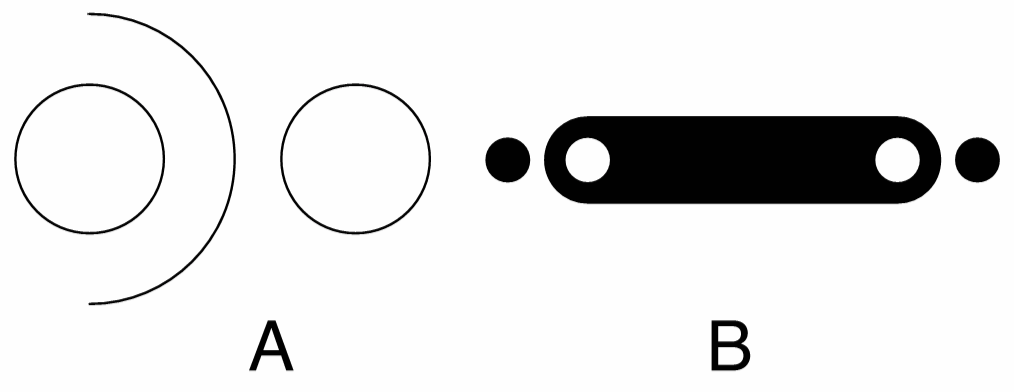
(A) a single object with a composite shape, (B) a custom stroke cap created from the object shape.
Stroke caps are small shapes used to mark the endings of open or dashed outline strokes. When rendering a stroke with a nonzero width, the ending at open nodes will be a flat by default. Traditionally, this ending was allowed to be a rounded or square extension of the stroke.
In VectorStyler, the stroke cap can be an arbitrary shape, consisting of one or more sub-paths. This shape should contain an open sub-path, that is attached to the stroke endings. The stroke cap can be edited and new stroke cap presets or styles created from object shapes.
When creating stroke cap shapes, the direction of sub-paths in that shape will also affect the resulting stroke cap. Stroke shapes generated around an outline are rendered using the winding fill mode. The direction of the cap shape that falls inside the stroke shape must be adjusted to obtain a transparent hole in the stroke.
Edit Stroke Caps
To edit the starting or ending stroke cap of the selected objects, select the Edit Start Cap or Edit End Cap commands from the stroke panel menu, or hold down the Option (Mac) or Alt (Windows) key and click on the starting or ending stroke cap drop box. The stroke cap editor view is shown, where the position of the cap relative to the path ending can be adjusted.
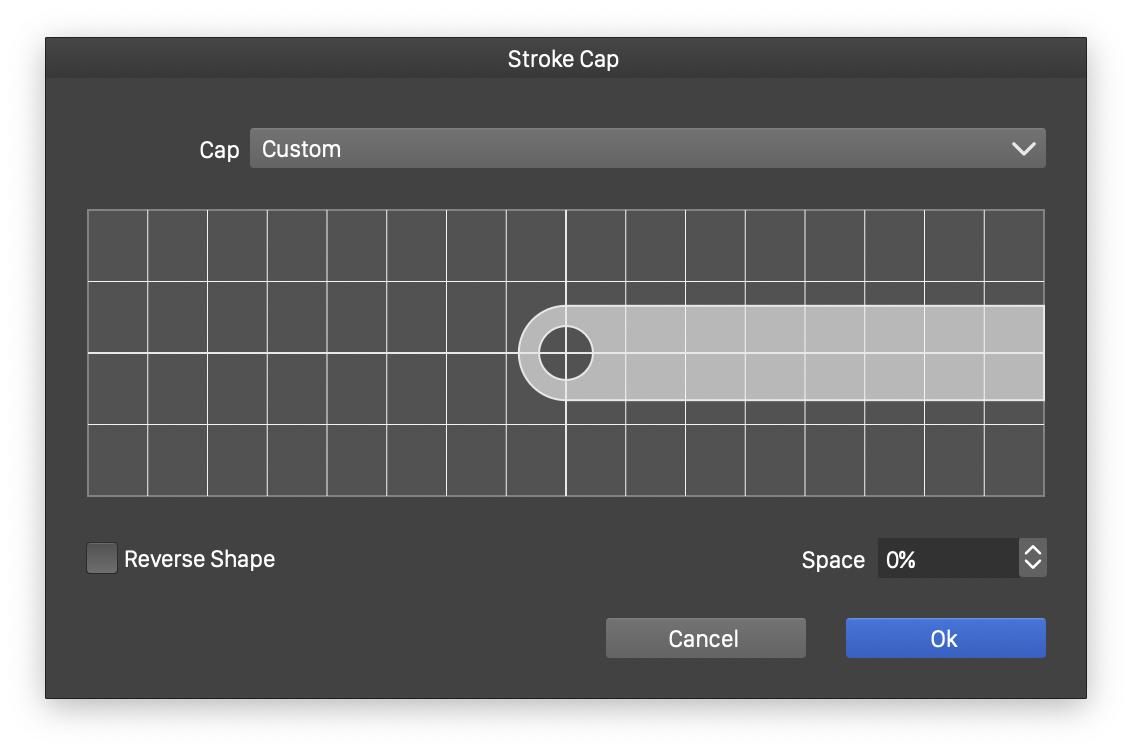
The stroke cap editor view.
Set the Space value to adjust the path extension or reduction for the stroke cap. The space is set in percentages, relative to the stroke width. The spacing can also be adjusted interactively. In the stroke cap preview area, click on the end of the stroke and drag the mouse. The stroke extension or reduction space is adjusted as the mouse is dragged.
The Reverse Shape check box enables or disables reversing of the cap shape. The cap shape is connected to the stroke shape to form the stroke area that is filled with a fill style. By default, this connection occurs in the direction of the open sub-path in the cap shape. When reversed, the connection is done in the reverse direction of the open sub-path, resulting in a significantly different stroke cap effect.
Create Stroke Caps
New custom stroke caps can be created from any object shape containing at least one open sub-path. If the shape contains multiple sub-paths, it is recommended that one is open, and the rest are closed. A shape with a single open sub-path is also suitable to be stroke cap shape.
Custom stroke caps can be created as presets or as styles. When creating and using presets, all attributes of the stroke cap (shape, spacing, reverse mode) are copied and stored into the object stroke attributes. Modifying a preset will not change the previously selected stroke caps of that preset.
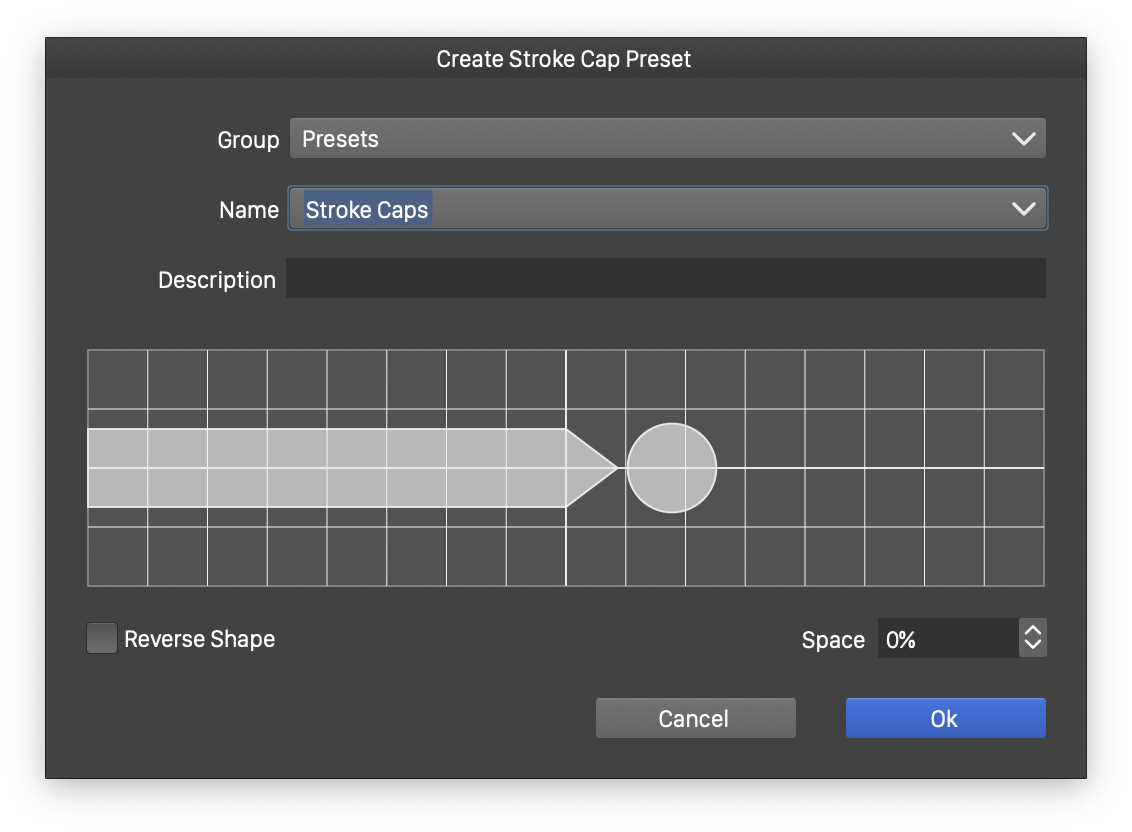
Creating a new stroke cap preset.
To create a new stroke cap preset:
- Select the Create Cap Preset command from the Styles - Create Styles menu, or the Create Cap Preset command from the stroke panel menu.
- The stroke cap preset options view is shown to set the preset options and the stroke cap attributes.
- Select the preset group (where to store the preset) from the Group field.
- Set the preset name in the Name field (required).
- Optionally, provide a preset description in the Description field.
- Adjust the stroke cap spacing, either by editing the spacing amount in the Space field, or by dragging the stroke cap end in the preview area.
- Select the cap shape reversing mode using the Reverse Shape check box.
- Confirm the stroke cap preset creation by pressing Ok.
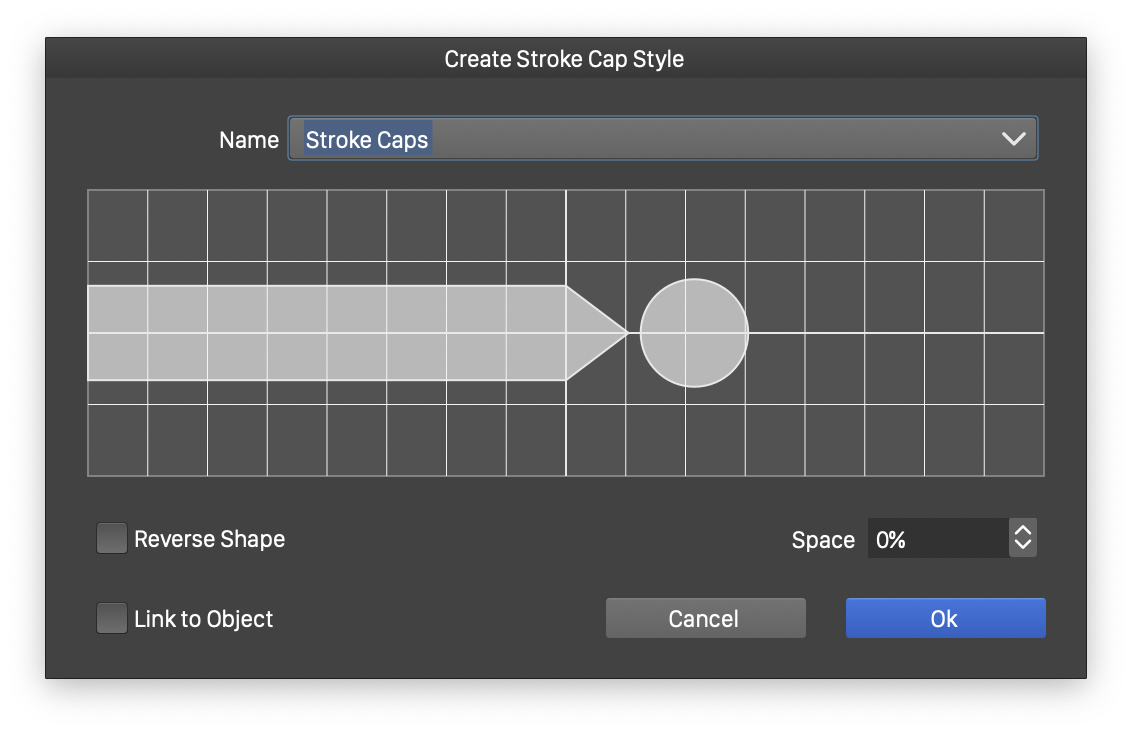
Creating a new stroke cap style.
When creating a stroke cap style, the cap shape can be linked to the object shape. This is possible with cap styles only, as styles are stored in the document. Linking the cap shape to the object shape enables the updating of the cap shape wherever the object shape changes. That is, after applying a custom cap style on multiple objects, the shapes of these stroke caps can be changed by editing a single object shape.
To create a new stroke cap style:
- Select the Create Cap Style command from the Styles - Create Styles menu, or the Create Cap Style command from the stroke panel menu.
- The stroke cap styles options view is shown to set stroke cap attributes and style name.
- Set the style name in the Name field (required).
- Adjust the stroke cap spacing, either by editing the spacing amount in the Space field, or by dragging the stroke cap end in the preview area.
- Select the cap shape reversing mode using the Reverse Shape check box.
- Enable or disable the linking of the cap shape to the object shape using the Link to Object check box.
- Confirm the stroke cap style creation by pressing Ok.


