References
An object reference is a link from an object to another object, directing an attribute of the object to be mirrored from the other object.
Object references can be used to define virtual styles, that act as regular styles, but instead of being stored in the style collection, these virtual styles are using the source object as the style storage.
Virtual styles are defined by assigning a name to an object and setting the object role to one or more style types. This can be done with the Object Options command from the Object menu, or in the Layers panel.
The name of the object defines the style name. The role of the object determines the type of the style, what attribute of the object is used as a style. Once an object is given a name and a role, it will automatically show up in style lists containing styles of the selected type.
Selecting Roles
The object role can be selected to one or more roles from the available role types. See the list of roles below. The object role selection determines the virtual style type defined by the object. A single object may have more than one role. With two or more roles, different attributes of the object define different style types. For example, it is possible to setup an object with both the Color Style and the Shape roles. The object fill will be a color style, and the object shape will be a shape style. Both styles will use the same display name, that is also the object name.
There are multiple ways to set the role of an object, and in most cases the object must be selected first.
- Use the Object Options command from the Object menu, and press the Role button. The menu contains the list of possible roles. Enable or disable roles, by selecting the role name in the menu.
- Use the Object Role sub-menu from the Object menu. Roles can be enabled or disabled on the selected object, by selecting the role name.
- The Appearance panel menu contains an Object Role sub-menu with the possible role types. Select a role to enable or disable roles on the selected objects.
- The Layers panel menu also contains an Object Role sub-menu with the possible role types. Here, the role selection applies to the objects selected in the layers panel.
- An object may have multiple roles (for example both color and shape styles). The Style panel will list the object name for both of these roles, and will append the role to the name to indicate which role is selected when the style is applied.
Using the Symbol role on an object, defines a virtual symbol referencing the object. Instances of this symbol will repeat the content of the object. Editing the object will cause all symbol instances to change.
For styling groups of objects based on other groups (of similar hierarchy) use the Group Style role along with the Object Style role. In this case the members of the styled group will have matching style to the members of the source group.
Reference Canvases
Objects with roles defining a style can be placed in any canvas, and any layer inside a canvas. Once an object has a role enabled, a style with the object name and the role type is available for selection in the various tools used to select styles.
In a typical workflow, objects defining styles or symbols are not part of the actual artwork, illustration or design. Typically, the actual design contains references to the styles and symbols defined using object roles. Therefore, it is recommended that objects used for style and symbol definitions are placed in another canvas.
In VectorStyler there are multiple canvases in a single document, organized into a hierarchy of canvases. The main design is placed on a regular canvas, selected with the Artwork Canvas command of the Canvas - Show Canvas menu. Reference canvases can be used as a place for setting up objects, that are used for other purposes than as main design elements. This includes style definitions using object roles, symbols, shapes for arrows, tiling pattern content, artistic, pattern and scatter brush content, or any other content that is not explicitly placed into the main illustration.
It is recommended, to place objects with roles on a Reference canvas, for a better organization of the document. There can be multiple Reference canvases in a single document, and each may contain objects for the same or different purpose. The use of reference canvases for style and symbol definition by object roles, can also be enabled by the Canvas Role option.
Instead of setting up roles for each object on a reference canvas, it is possible to enable one or more roles for the canvas, and let all objects inside that canvas assume these roles. This makes the creation of new objects for a specific set of roles easier. It is sufficient to setup the object on a reference canvas with a role, and set a name for the object. All such objects are listed as style types, corresponding to the roles enabled for the canvas.
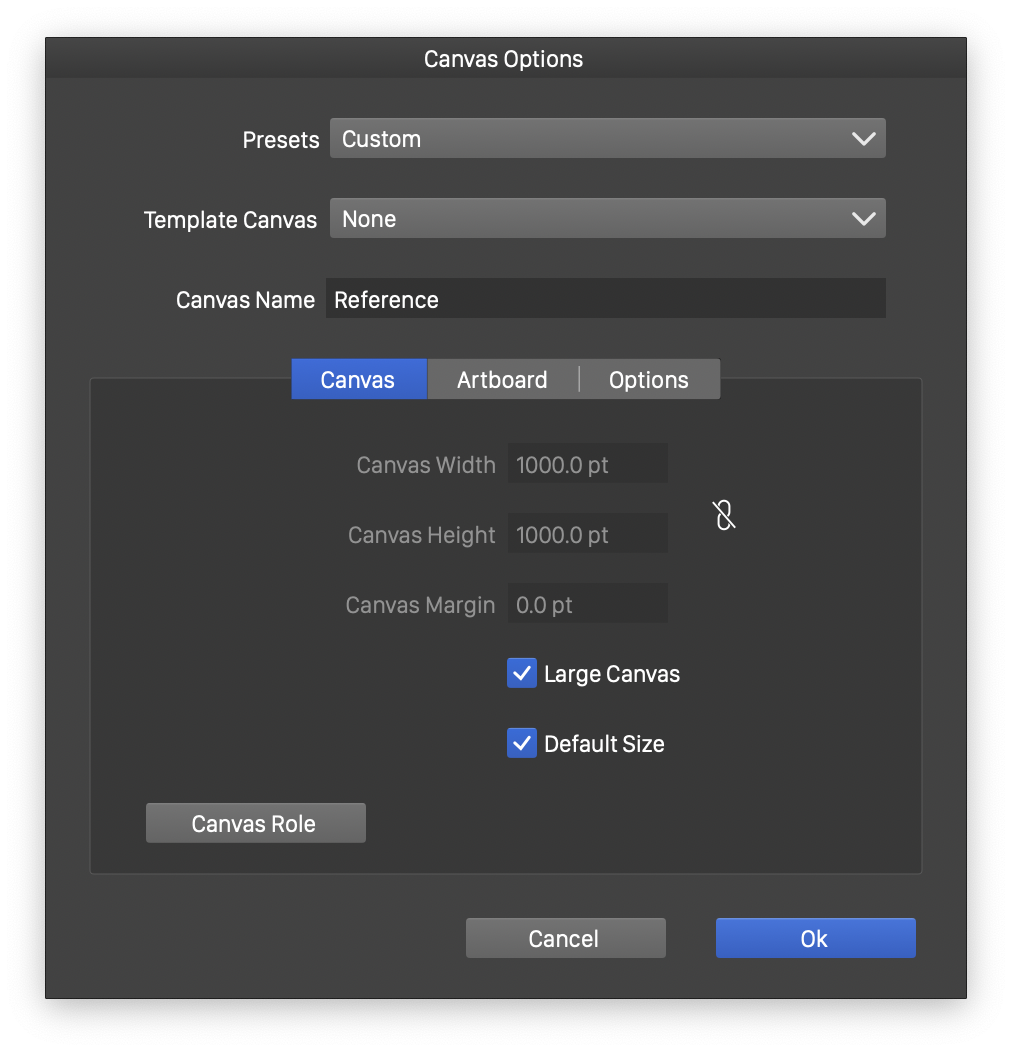
The Canvas Options view
To select the canvas role for a reference canvas, use the following steps:
- Activate the reference canvas. This can be done in the Canvas & Artboard panel.
- Select the Canvas Options command from the Canvas menu. This will open the Canvas Options view to edit the settings of the current canvas.
- The Canvas section of the Canvas Options, contains the Canvas Role button.
- Click on the Canvas Role button, and enable or disable roles from the menu of role types.
- Confirm the canvas style settings.
- The objects of the reference canvas are now used as styles or symbols with the selected canvas role types.
- Individual objects on a reference canvas can have their own additional role types enabled, but it is not possible to disable the canvas role for an object on the canvas.
Besides symbols, many style types use the whole object as a content to define an attribute. It is recommended to use reference canvases, as a common place for such objects. Reference canvases also help with the easy access and editing of these objects, regardless of their role and use.
Select the reference canvas in the Canvas & Artboard panel to activate a reference canvas, and edit the object. The Canvas & Artboard panel can be used to return to the regular canvas using these styles and symbols to check the result.
It is also possible to open additional document views (New View command in the view menu), and set one view to a reference canvas and the other to the regular canvas. Then the changes made on objects, symbols and other content of the reference canvas, can be directly observed in the style and symbol instances of the artwork canvas.
Some of the cases when whole objects are used as styles:
- The Symbol role defines an object as a symbol, that can be used in the document or inserted into text.
- The Object Style role uses multiple attributes of an object, including fill, stroke, transparency, image effects, as a style for other objects.
- The Transparency Content role uses the whole object as a transparency mask of other objects. The name of objects with the Transparency Content role are listed in the Transparency panel.
- The Tiling Pattern Content role uses the whole object as a tiling pattern content.
- The Clone Source Object role uses the whole object as a clone source object of a clone.
These objects can be edited on a reference canvas, while observing the changes in an other document view on a regular canvas.
Object Roles
Using object references as virtual styles and symbols, enables a quick access and editing to the actual style value, by editing the object. The object role can be selected using the Role button in the Object Options view, or from the Object Role menu of the Object menu. The type of styles that can be defined using object roles are as follows:
- Symbol, any object can act as a symbol source object.
- Object Style, the styles of the object act as an object style.
- Group Style, the object style is mirrored for members of the group.
- Transparency Content, the object acts as a transparency mask content. This role can be used to define content for directly editable transparency masks.
- Tiling Pattern Content, the object acts as a tiling pattern content. The content can be selected in the Content field of the Pattern panel.
- Clone Source Object, the object is shown in the Clone Source Object lists, and can be selected as a clone source object of a clone.
- Shape, the shape of the object acts as a shape style, named with the object name. Changing the object shape, will change all instances of the shape style use.
- Corner Shape, the shape of the object acts as a corner shape style, named with the object name. Changing the object shape, will change the corner shapes using this style.
- Linear Gradient Shape, the shape of the object acts as a linear gradient shape style, named with the object name. Changing the object shape, will change the shape of gradients using this style. Only open shapes are suitable as linear gradient shape styles.
- Concentric Gradient Shape, the shape of the object acts as a concentric gradient shape style, named with the object name. Changing the object shape, will change the shape of gradients using this style. Only closed shapes are suitable as concentric gradient shape styles.
- Conical Gradient Shape, the shape of the object acts as a conical gradient shape style, named with the object name. Changing the object shape, will change the shape of gradients using this style. Only open shapes are suitable as conical gradient shape styles.
- Blend Shape, the shape of the object acts as an object blend trajectory shape style. Blend shapes can be selected on object blend effects from the Blend panel.
- Contour Shape, the shape of the object acts as an object contour position shape style.
- Transparency Mask Style, the transparency settings of the object act as a transparency style.
- Fill or Mask Region, the region defined by the object (shape or content) acts as a fill or mask region. See the Object Styling section for more details on fill and mask regions.
- Filter Mask, the transparency settings of the object act as an image effect mask style. Image effect masks can be used to control the strength of the image effect or some of its parameters.
- Filter Image, the object is converted to an image and used in the displacement (or other) image or shape effects.
- Filter Mask Area, the region defined by the object (shape or content) acts as an image effect mask region.
- Inline Shape, the shape of the object acts as a glyph shape style. Glyph shape styles can be inserted from the Glyph panel into text, by using the Inline Shapes list.
- Inline Object, the object acts as a symbol that can be inserted into a text. These symbols can be inserted from the Glyph panel into text, by using the Inline Objects list.
- Plain Text, the text content of the object acts as an unformatted text component. Unformatted text components can be inserted into text from the Styles panel.
- Styled Text, the text content of the object acts as a formatted text component. Formatted text components can be inserted into text from the Styles panel. Formatted and unformatted text component are used as variables in text, that can be easily replaced, by overwriting the style.
- Shape Effect, the shape effects applied on the object act as a single shape effect style.
- Image Effect, the image effects applied on the object act as a single image effect style.
- Corner Style, the corner settings of the object shape act as a corner style. Shapes using this corner style, will have the same corner attributes as this object.
- Color Style, the fill color of the object acts as a color style.
- Pattern Style, the pattern fill of the object acts as a pattern style.
- Gradient Style, the gradient fill of the object acts as a gradient style.
- Gradient Shape, the shape of the gradient fill of the object acts as a gradient shape style.
- Gradient Color, the color of the gradient fill of the object acts as a gradient color style.
- Noise Style, the noise fill of the object acts as a noise style. Noise styles can be used as fill styles, or as parameters in various shape and image effects.
- Noise Fill Style, the noise fill of the object acts as a noise fill style. Noise fill styles can be used as fill styles in other objects.
- Fill Style, the fill style of the object acts as a fill style. The fill style can be used to fill other objects. The fill style may be a color, tiling pattern, gradient or noise.
- Fill Content, the fill content of the object acts as a fill content style. The fill content style includes both the fill style and the transparency settings of the fill.
- Stroke Content, the stroke content of the object acts as a stroke content style. The stroke content style includes the stroke attributes, stroke style and the transparency settings of the stroke content.
- Artistic Brush Content, the object acts as an artistic brush content style. Objects with this role will show up in the Artistic Brush view.
- Pattern Brush Content, the object acts as an pattern brush content style. Objects with this role will show up in the Pattern Brush view.
- Scatter Brush Content, the object acts as a scatter brush content style. Objects with this role will show up in the Scatter Brush view.
- Brush Style, the brush settings of the object acts as a brush style. The brush style includes the brush width, profile and content.
- Brush Type, the brush settings of the object acts as a brush type. The brush type includes only the brush content (artistic, pattern, scatter, bristle), but not the width or the profile.
- Pattern Frame, the object acts as a pattern frame object. The pattern frame is an object inside a pattern content, that is used as a reference for the pattern tile size. For more on pattern frames, see the Tiling Patterns chapter.
- Stroke Cap Style, the shape of the object acts as a stroke cap style. The object name and shape will be shown in the stroke cap list of the Stroke panel.
- Stroke Arrow Style, the shape of the object acts as a stroke arrow style. The object name and shape will be shown in the stroke arrow list of the Stroke panel.
- Stroke Dash Style, the stroke dash setting of the object stroke acts as a stroke dash style.
- Stroke Stripe Style, the stroke stripe setting of the object stroke acts as a stroke stripe style.
- Stroke Profile Style, the variable width profile of the object stroke acts as a variable width profile style.
- Stroke Style, the stroke setting of the object acts as a variable stroke style.
- Character Style, the primary character formatting options from the object, act as a character style.
- Paragraph Style, the primary paragraph formatting options from the object, act as a paragraph style.
- Character Line, the primary character lining options from the object, act as a character lining style.
- Paragraph Line, the primary paragraph lining options from the object, act as a paragraph lining style.
- Font Name, the primary font name from the object, acts as a font name style.
- Text Background, the primary text background from the object, acts as a text background style.
- Text Frame Style, the text frame settings of the object, acts as a text frame style.
- Text on Path Style, the text on path settings of the object, acts as a text on path style.
- Text Wrap Style, the text wrap settings of the object, act as a text wrap style.
- 9-Slice Scale, the 9-slicing settings of the object, act as a 9-slicing style.
- Snapping Target, this role designates the object as a snapping target, when restricted snapping is used. This role is not a style definition.
- Blend Path, path for a blend object.
- Contour Center Path, path for a contour object.
- Repeater Style, repater options from a repeater object reused as a style.
- Repeater Geometry, repater geometry options style.
- Repeater Colorizer, repater colorizer options style.
- Repeater Position, repater positioning options style.
- Repeater Selection, repater object selection style.
- Edge Extractor, edge extractor style used for manual image tracing tool.
- Data Grid Place, layer role for placing repeated canvas grid content when using data sources.
- Data Grid Source, role for a layer or object to turn into a repeated content of a data grid.
- Reference Folder, role for a layer to use it as a folder in the induced style hierarchy of objects with styling roles.
- Skip Style Listing, do not list this object on a reference canvas as a style.
Example 1: Color styles from an object
With the following steps, a new color style is defined, that is mirrored as the fill color of an object:
- Create an object and set a fill color.
- Select the Object Options command from the Object menu.
- Set the object name, and enable the Color Style role from the list of object roles, accessed using Role button in the Object Options view.
- Confirm the object name and role settings by pressing Ok.
- The Styles panel shows a new color style, with the object name, that cannot be edited or removed using the editing tools of the Styles panel.
- Select an other object, and select the color style from the Styles panel.
- The second object has the same fill color as the source object.
- Select the source object, and change its fill color.
- The objects using the color style are updated automatically, as the source object color is changed.
Example 2: Using the shape of an object
With the following steps, the shape of an object is used to set the shape of other objects, by defining a shape style using the Shape role:
- Create an object with a polygon shape (or any other shape).
- Edit the object shape, to achieve the desired shape.
- Select the Object Options command from the Object menu.
- Set the object name, and enable the Shape role from the list of object roles, accessed using Role button in the Object Options view.
- Confirm the object name and role settings by pressing Ok.
- The Styles panel shows a new shape style, with the object name, that cannot be edited or removed using the editing tools of the Styles panel.
- Select an other object, and select the shape style from the Styles panel.
- The second object will have the same shape as the source object.
- Repeat the shape selection on other objects also.
- Select the source object, and change its shape using the regular shape editing tools.
- The shape of the objects using the shape style are updated automatically, as the source object shape is changed.
Example 3: Defining symbols using object referencing
With the following steps, a new symbol is defined by using the Symbol role on an object:
- Create an object, that should serve as the symbol source object.
- Select the Object Options command from the Object menu.
- Set the object name, and enable the Symbol role from the list of object roles, accessed using Role button in the Object Options view.
- Confirm the object name and role settings by pressing Ok.
- The Symbols panel shows a new symbol, with the object name. This symbol cannot be edited or removed using the editing tools of the Symbols panel.
- Add one or more symbol instances of the new symbol, from the Symbols panel, to the current canvas.
- Select and modify the attributes of the symbol source object.
- All symbol instances are updated automatically, as the source object is changed.
Benefits of Using References
Object references and object roles are one of the new workflow features, introduced by VectorStyler. With object roles, objects can be designated as symbols, or a source of a style, without the need to create a new style. The symbol and style remains readily editable, by editing the object.
Some of the benefits of using references are:
- The same dynamic linking as for styles. Object references are treated as styles.
- The source object can be easily accessed and changed, changing the style or symbol defined by the object role.
- It is easier to edit the object interactively, than to edit a style in a modal view, launched from the Styles panel.
- For example: an object with a shape reference, can be easily changed with the interactive shape editing tools.
- Objects can be placed on reference canvases, to better organize symbols and styles.
- A reference can be assigned one or more roles, making all objects on that canvas act as if they would have those roles.
- Creating a new symbol can be as easy as creating and naming a new object on a reference canvas with the Symbol role.
- Reference canvases can also have activation flags, taking part in the style activation mechanism. See the Style Activation section.


