Playing with Blend in Pattern Brush
-
.
Table of content
.
1. Post -- is below here
Using Blends, Multiblends and Variations
.
2. Post
Tip -- Even distributed shapes between decreasing Pattern Shapes
.
3. Post
Tip -- Combining Pattern Brushes and combining rigid and non rigid Pattern Brushes
.
.
HiBack to play again in VS
")
This time with:
The Pattern Brush and - Blend object inside pattern and other brush types -
( a new functionality in VS since Version 1.0.42 )
.
.
Whats to see?
-- Multi Blends in VS with the Blend Tool
-- some Tricks / Ideas
-- using of Style Picker in conjunction with a Pattern Brush
.
.
A few Notes beforehand:
This is not a tutorial, I'm just showing some finds/ideas and tricks
I noticed while playing with the Pattern Brush since version 1.1.042
despite that I kept it in some order
.
The new functionality may not be helpful in any case because
it sometimes creates artifacts.
.
While i play with different Designs i found out that those Pattern
often have a few sweet spots and some Pattern Brushes dont
work on any Shape.
.
Round Corners work better then sharp Edges. Bigger Shapes
better then small ones and tight curves could cause Problems.
So, from Shape to Shape you have to find some workarounds
to get the Results you after.But anyway all this is still better then to live without that Pattern Brush feature.
I nevertheless have fun with it and am glad about this new option
.
.
Here we go:
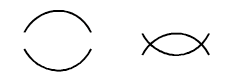
To create a Blend select two shapes, Blend and Group them (Blend Tool (W) )
.
To create a Pattern Brush with it, select your grouped Blend
go to Menu Styles -> Create Styles -> Create Pattern Brush Preset
.
.

Then choose the Brush Tool (B) select your Pattern Brush and paint.
.
If you dont want any Pattern Deformation, choose "rigid shapes" and
"scale rigid shapes" in Pattern Brush Option Menu.
.
.

If you dont want those repeatings, create longer Blends (e.g. a longer Pattern)
.
.
.

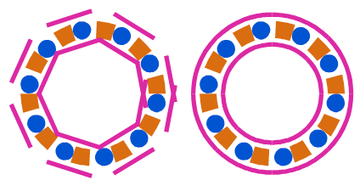
For those who do not know it yet: Multiblends are also possible.
Select the first two shapes, create a blend. Then select the last shape
of this blend and the new shape and so on...
.
The sad news are, this would give you no continues Curve
.
The good News are, if you create a pattern brush with your Blend
that give you that continues Curve now
.
.
.
Multiblends don't necessarily have to be created with the last shape.
You can be creative and mix them according to your taste
These are 4 individual blends, which was then grouped together
.

.
.

.
But remember to play with the Settings/Shape size to avoid Artefacts
.
. -
Whow, I have to play with that soon!

-
-
My playing ended in the first stage. Unfortunately I am getting a strange transformation when applying the blend effect. Mapping does not help

MacBook Air M4 24Gb, Tahoe 26.3.1
-
@encart Maybe you need to flip and also rotate one of the shapes.
-
@b77 Thanks! Flipping solved the problem.
-
-
How to get better even spacing in such patterns

.
.

Even spacing between the shapes is easy with such patterns
.
.

But seems not possible when using Profils
.
.

Using Blend gives us the option to adjust the space with "Position"
in Blend Option. But I am not really happy with this way.
.
.
.
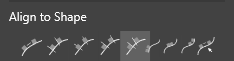
I like to use the Alignment Panel and the Align to Shape "...distribute equal distances..." icon.
.
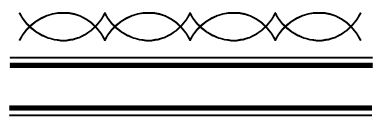
Here how to do it:
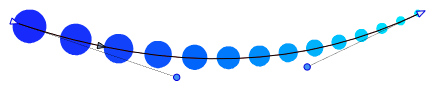
Create a Blend with your Pattern.
( Transformation with copy would also work, I find a Blend easier )
Expand the Blend and Ungroup it and draw a straight Line below.

.
.

Select all shapes of the pattern. Hold the Shift-Key and select the straight line.
Call the Alignment Panel. In the Align Panel Menu, select Geometric Alignment
and then the > Align to Shape "...distribute equal distances..." Icon.
.
.
Here a Video, how to do it, re-upload:
.
.
Delete the Line and Group the Result an create a Pattern Brush Preset with it.
Set "Rigid shapes" and "Scale rigid shapes".
.
.
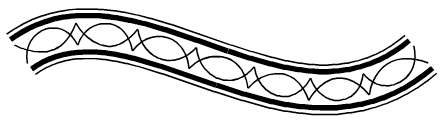
To control the space between the Shapes in this Pattern Brush,
play with the Line length and with the Node Handles
.
.
.
. -
Combining Pattern and combining rigid and non rigid Pattern Brushes
.
.
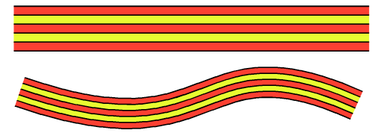
Sometimes it doesnt work to set the shapes in your pattern brush
to rigid or non-rigid. As it will not cover all needs of your Pattern.Like this example show:
.
.
The solution is a simple practical one:
Create two Pattern, set one Part to rigid and the other Part not
and place one Pattern on top of the other.
.
Copy your Shape and apply the first pattern onto
the one shape and your second pattern onto the copy.
.
Select both, use Alignment panel, click on horizontal center
and vertical center and you have a much nicer result than before.
( is also possible to record a Action with the Alignment Steps,
so its just one click then)
.
Found this a nice way to combine several different pattern brushes.
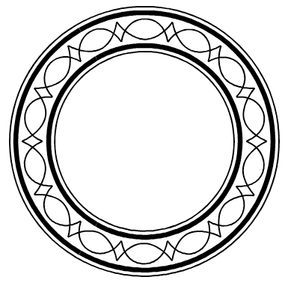
E.g. creating pattern for inner and outline structures.
.
.
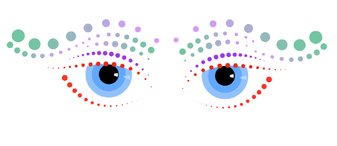
Here some Example Pictures:
.
.
.
.
.
.

.
.
.

3 Pattern Brushes used
.

-
@Subpath Well done

I should have read this before starting the blending thread... well, too late

-
@Pat said in Playing with Blend in Pattern Brush:
Thank you
I should have read this before starting the blending thread
... not really necessary, I like your own view
-
S Subpath referenced this topic on
-
 C Clippy notes referenced this topic on