Fonts
A font contains character designs in a particular style. Each visual character form is called a glyph. Fonts may include glyphs for one or more languages.
A typeface, or font family, is a group of fonts with a shared design. It usually includes different weights and styles, which appear together in the font list.
VectorStyler supports TrueType (TTF), OpenType (OTF), and Adobe Type (PFB) fonts. You can also use fonts embedded in PDF or PostScript files by creating a font collection from a folder containing those files. By default, VectorStyler uses fonts installed in your operating system. You can load additional fonts without installing them.
Font files are not embedded in VectorStyler documents. To open a document on another computer with the same fonts, make those fonts available there too, for example by copying the font files separately.
With font collections, you can:
- Select a font file to use without installing it.
- Organize fonts into smaller groups for easier selection.
- Create a collection from a folder of fonts.
- Create a collection from selected fonts.
- Use fonts embedded in PDF and PostScript files.
Selecting Fonts
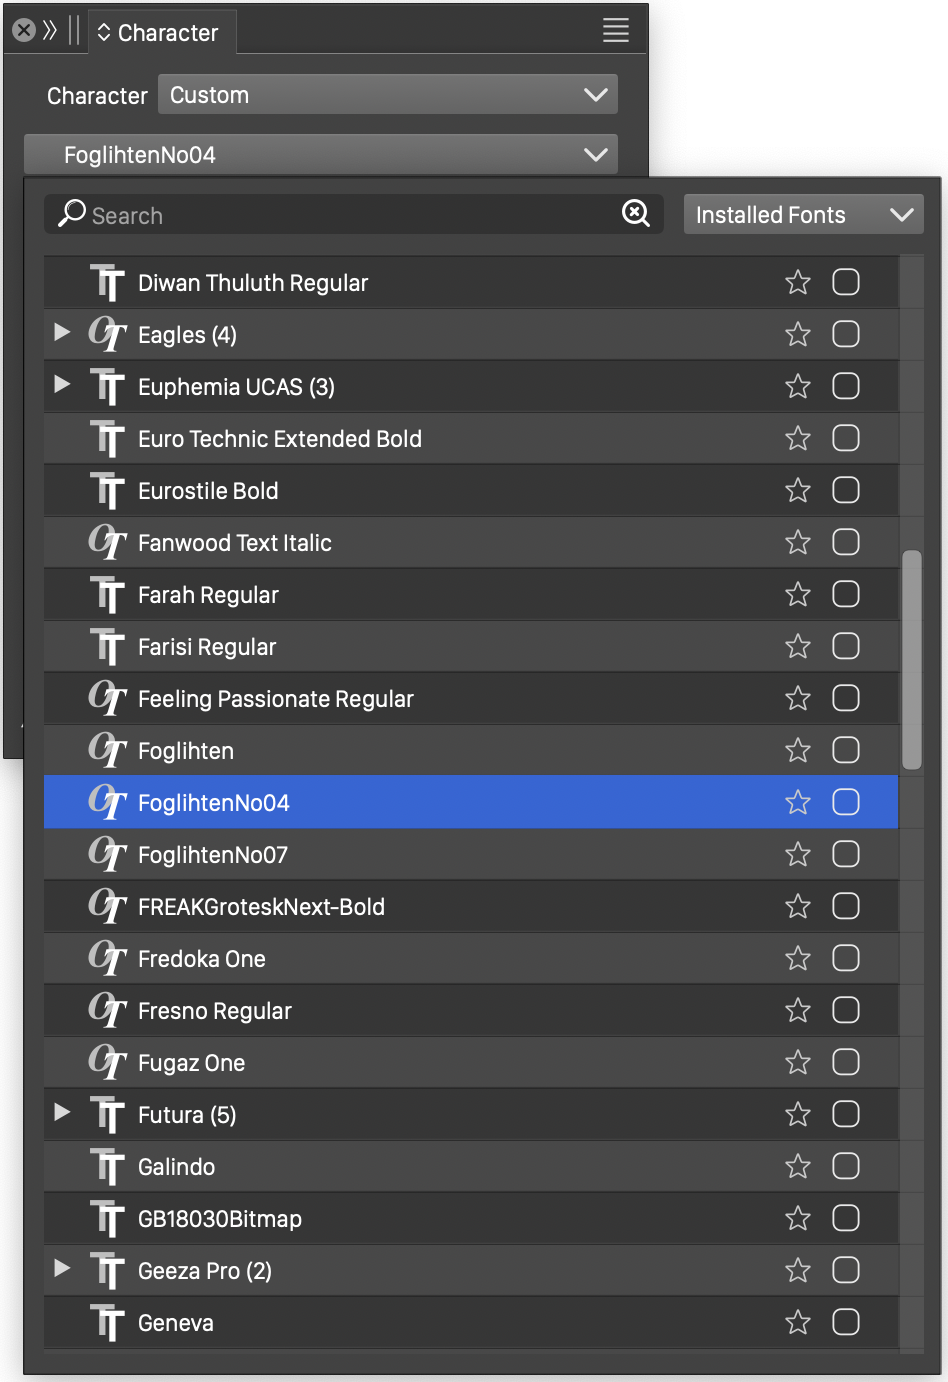
The Font Selector
Use the Font Selector to browse and select fonts. Open it from the Character panel, the Character Options dialog, or another font control.
The selector lists fonts from the current collection and provides these controls:
- (1) Search for fonts by name.
- (2) Choose a collection, open a font file, or manage collections.
- (3) Browse typefaces in the current collection. Click the arrow beside a typeface to show its styles.
- (4) Preview the font with the selected text.
- (5) Add or remove the font from your favorites.
- (6) Add or remove the font from the document’s favorites, which are stored with the document.
The floating Fonts panel offers similar controls.
These built-in collections are always available and cannot be removed:
- All Fonts - Fonts from all collections, listed alphabetically.
- Collection - Fonts organized by collection.
- Installed Fonts - Fonts installed in your operating system. This collection changes when you install or remove fonts.
- Favorite Fonts - Fonts marked as favorites with the buttons at (5).
- Document Favorite - Favorites stored in the current document. Each document can have its own collection.
- Recent Fonts - Recently used fonts. Set the maximum number in the Recent Fonts field in the Window section of the application settings.
Some collections also appear in the Text menu. To add a custom collection there, enable Show in Menu in the font manager.
Managing Fonts

The Font Manager
Choose Font Manager from the Text menu to create and manage collections. Each collection is a preset with the same storage options as other Presets:
- Store a collection in a document to make it available while that document is open and active.
- Store it globally to use it in any document.
- Store it in a custom preset group to share the group as a file with other users.
The Font Manager provides these controls:
- Groups - Choose the preset group containing the collections you want to manage.
- The list below Groups shows the collections in that group. It is initially empty because no custom collections have been defined.
- Add Group - Open the font group editor to build a collection from selected fonts.
- Add Folder - Choose a folder containing supported font files. The collection refers to the folder, so changes to its files affect the collection.
- Edit - Edit the selected collection. This opens a folder chooser for a folder collection, or the font group editor for a collection of selected fonts.
- Remove - Remove the selected collection.
- Options - Open preset management commands. See Presets for details.
- Show in Menu - Show the selected collection in the Text menu. This is off by default for custom collections.
- Close - Close the manager. Changes made here cannot be canceled.
Font Collections
Build a custom collection by choosing fonts from other collections, including installed fonts and fonts in folders.

The Font Group editor
Use the Font Group editor to name the collection and choose its fonts:
- The left side shows the collection’s name and fonts, with controls for editing them.
- The right side shows fonts from the source collection.
- Name - Set the name used to identify the collection throughout the application.
- To remove fonts, select them in the left list and click Remove.
- To empty the collection, click Clear.
- To add a font file, click File and choose the file.
- To add fonts from another collection, select them in the right list and click Add.
- Use Collection to choose the source collection.
Assign to Collections
You can also assign fonts to collections in the font manager. Select one or more editable collections, then click Assign. Folder collections cannot be edited this way.

Assigning fonts to collections
The assignment dialog lists fonts on the left and the selected collections on the right.
To assign fonts to collections:
- Select the fonts on the left.
- Check the collections to which they should belong.
To remove the selected fonts from a collection, uncheck that collection.
Font Folders
Use a folder as a font collection to access its fonts without installing them in your operating system.
For example, you can keep fonts in folders organized by foundry or source and access each folder as a collection.
Click Add Folder in the Font Manager and choose the folder. The collection refers to that folder; it does not copy or install the fonts.
Updating Fonts
VectorStyler reads installed fonts and active font folders when it starts. If you install or remove a font, or change a folder’s contents, the font lists may not update immediately.
Choose Rescan Fonts from the Text menu to refresh all font collections and lists. Restarting VectorStyler also refreshes them.
Replacing Fonts

The Replace Font dialog
Choose Replace Font from the Text menu to replace fonts in a document or selection. Map each original font to the font you want to use.
Use font replacement to:
- Change fonts in a document or selection.
- Replace missing fonts.
- Create a temporary font mapping for one document or the application, while retaining the original font names.
The Replace Font dialog provides these controls:
- Mode - Choose the replacement scope or create an alias:
- Document - Replace fonts throughout the document.
- Selection - Replace fonts in selected objects.
- Missing - Replace missing fonts only.
- Global Alias - Map fonts to available fonts for display in all open documents, without changing the original font names.
- Document Alias - Store a similar mapping in the current document.
- The table lists original fonts in the Name column and replacement fonts in the Replace column.
- Click a cell in the Replace column, choose a font, and click outside the font selector.
- When a replacement is set, the
 button appears in the third column. Click to clear it.
- Preview - Preview the selected replacements.
Font Mapping
A document may use fonts that are unavailable on your computer, for example if it was created on another computer.
VectorStyler displays missing fonts using available substitutes while keeping the original font names in the document. The text’s appearance may change.
Create a font mapping to choose the substitutes yourself. You can map missing fonts or any other document fonts without permanently replacing their names.
Choose Replace Font and set Mode to Global Alias for an application-wide mapping, or Document Alias for a mapping stored in the current document.


