Intertwine Groups
Intertwine groups change which object appears on top within specific regions, while preserving the objects’ overall stacking order. Use them to create editable interwoven designs without cutting the original objects apart.
Create an intertwine group from any collection of objects or groups. Edit its contents in the Layers panel or in isolation mode, just as you would with a regular group. Regions created by automatic detection can update when the underlying objects change.

An intertwine group.
Creating Intertwine Groups
- Select the objects to include.
- Choose Styles - Intertwine - Create Intertwine Group. The new group appears in the Layers panel.
- Activate the Intertwine
 tool.
- Click an area where objects overlap to detect a region and change the object order there. Alternatively, drag around an area to draw a region yourself.
Automatically detected regions can update as the underlying shapes change. A region drawn by dragging uses the path you drew. You can edit either type of region with the Node tool; manually editing an automatically detected region stops its automatic shape updates.
Intertwine Group Commands
The Styles - Intertwine menu contains these commands:
- Create Intertwine Group - Create an intertwine group from the selected objects.
- Release Intertwine Group - Convert the selected intertwine group to a regular group.
- Expand Intertwine Group - Expand the selected group into separate clipped regions.
- Reset Intertwine Group - Remove all reordering regions from the selected group.
- Intertwine Options - Edit the group’s options.
Editing Intertwine Groups
Activate the Intertwine tool. The context panel provides two options:
- Order on Create - Reorder objects when you create a region.
- Order on Select - Reorder objects when you select an existing region.
Use the tool to create and edit regions:
- Click an overlap to create a region automatically, or drag around an area to draw one.
- Hold Option (Mac) or Alt (Windows) and click a region to select it.
- Click a selected region repeatedly to cycle through different object orders.
- Hold Shift and click to select multiple regions.
- Press Delete to remove the selected regions.
- Use the Node tool to edit a region’s shape.
The Layers panel shows the object order within the selected region. Drag objects in the panel to change their order in that region only. You can also use the panel to add or remove objects from the group.
Double-click the group with the transform tool to enter isolation mode and edit the original objects. Automatically detected regions update when these objects move or change, provided the region shapes have not been edited manually and dynamic regions are enabled.
Intertwine Group Options
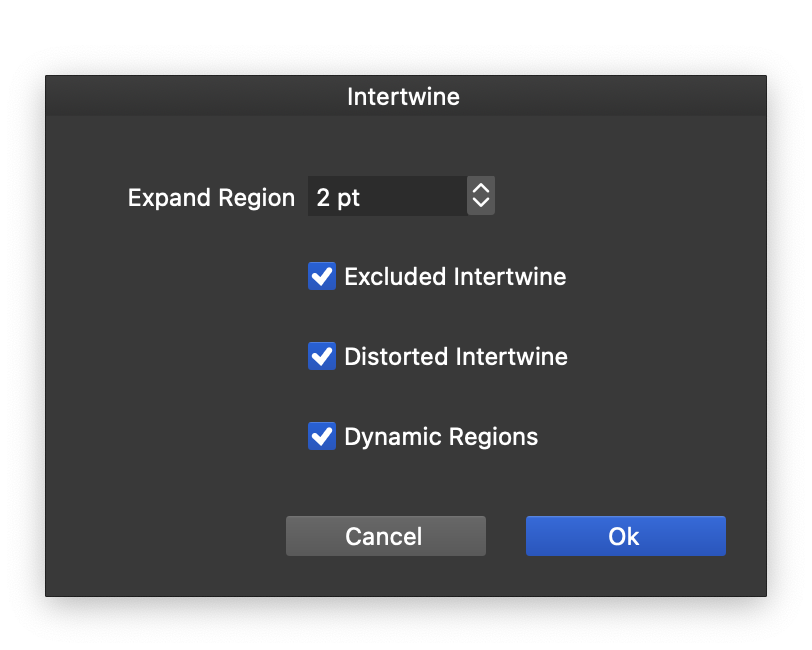
Intertwine group options.
Select the group and choose Styles - Intertwine - Intertwine Options to edit these options:
- Expand Region - Set how far automatically created regions expand.
- Exclude Intertwine - Exclude reordered regions when displaying the group’s original content.
- Distorted Intertwine - Apply shape effects to the intertwined result. When disabled, shape effects are applied to the objects before the regions are calculated.
- Dynamic Regions - Create dynamic regions when clicking overlaps. These regions update automatically when the underlying objects change.


