Blend Tools
Create and adjust blend effects interactively with the two blend tools in the toolbox.
The Blend Tool
Use the Blend  tool to create blends, move source objects along a blend path, or extract intermediate objects.
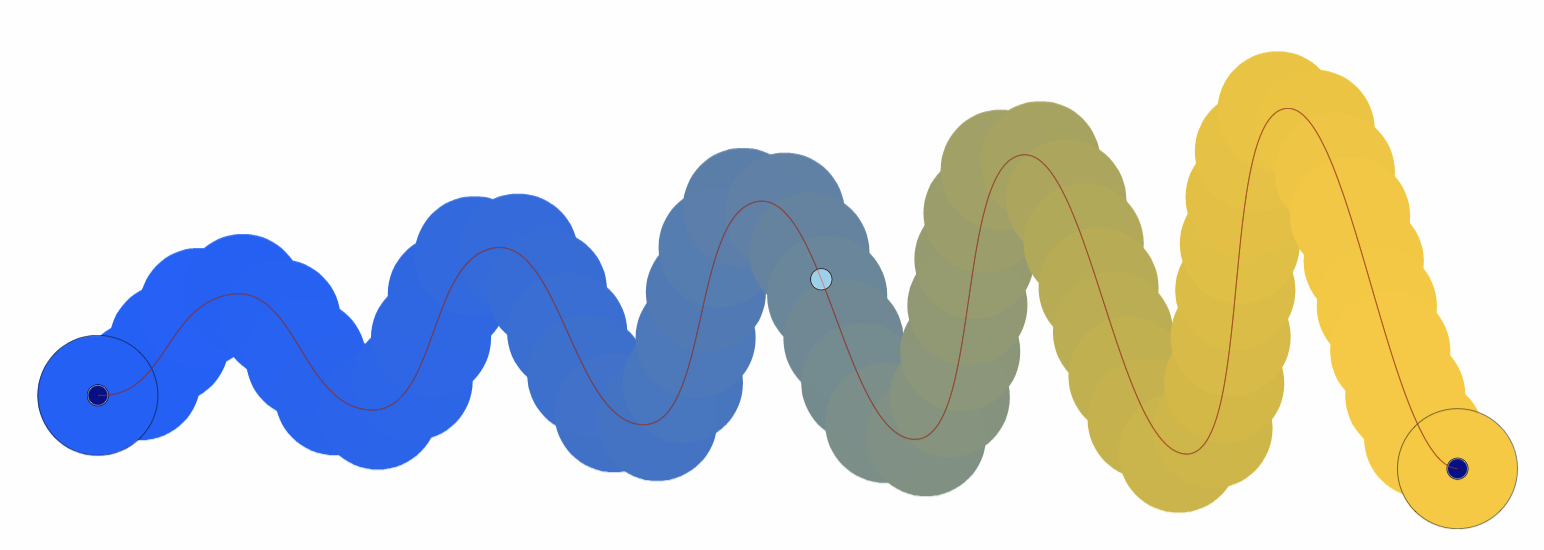
The Blend tool indicating where an intermediate object can be extracted.
To create a blend, activate the tool and click the first object, then the second.
To move the end objects along a blend path:
- With the Blend tool, click an intermediate object to select the blend.
- The path appears, with dark blue handles at the centers of the end objects.
- Drag a handle along the path. Keep the cursor close to the path to place the object on it.
Intermediate objects are generated automatically from the blend settings. You can extract one as a separate object:
- With the Blend tool, hover over the blend path or center line. A light blue node marks the detected position.
- Double-click to create a new object at that position and split the blend into two blends connecting it to the original end objects.
To extract an object without changing the existing blend, hold Command (Mac) or Control (Windows) while double-clicking.
Blend Mapping
The Blend Mapping  tool matches positions on the two end shapes to control the transition between them.
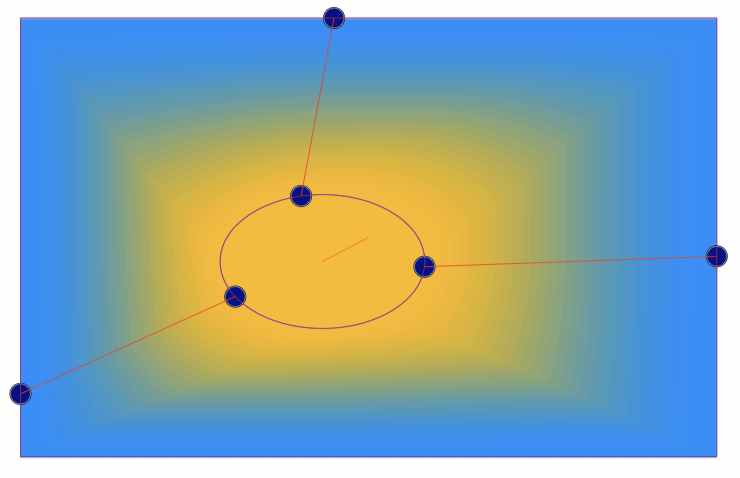
Mapping positions between a rectangle and an ellipse.
The default mapping depends on the shapes’ geometry and the Weighted option. To customize it:
- Activate Blend Mapping, found in the same toolbox group as the Blend tool.
- Hover over either end shape. A light blue handle appears on each shape, joined by a line that shows the default mapping.
- Double-click a position on a shape to create a mapping pair. Your pair appears as dark blue handles joined by a red line.
- Drag either handle along its shape to adjust the mapping. Keep the cursor close to the shape.
Double-click other positions without mapping nodes to add more pairs. To remove a pair, drag a handle away from its shape.


