Blend Panel
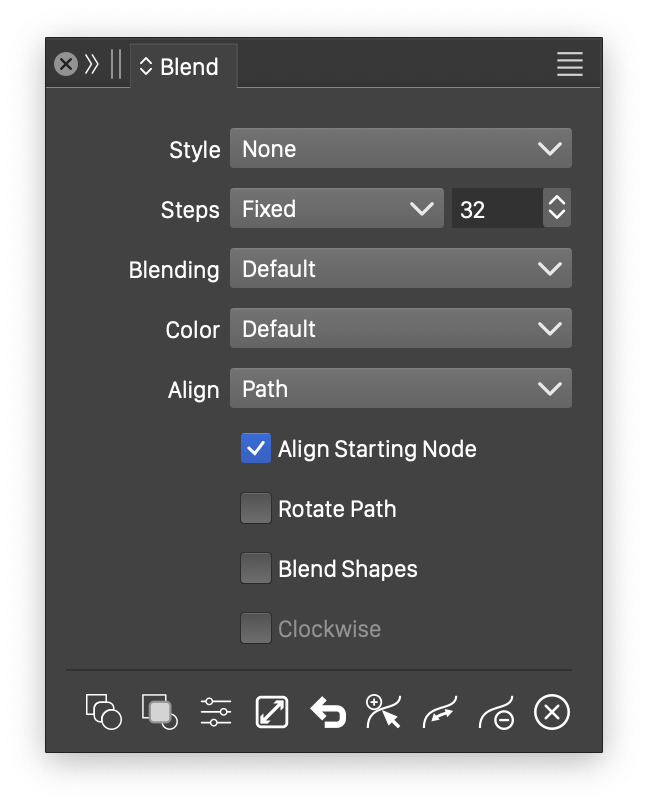
The Blend panel.
Open the Blend panel from Effects - Blend or Panel - Effects to create blends and adjust their settings. When you select a blend object, the panel shows its current settings.
The panel contains these controls:
- Style - Create or reuse blend attribute styles and presets.
- Steps - Control the number or spacing of intermediate objects.
- Fixed - Enter the number of intermediate objects.
- Distance - Set the distance between intermediate objects.
- Smooth - Set the smoothness of color transitions.
- Blending - Choose the scheme that controls how one path transitions into another.
- Color - Choose the color mode for color transitions.
- Align - Choose a shape style, preset, or object with the Shape role as the blend path. It positions both the original and intermediate objects.
- Align Starting Node - Automatically find matching start nodes on the two paths.
- Rotate Path - Rotate intermediate shapes to follow the blend path. This applies only when a blend path is used.
- Blend Shapes - Blend the parameters of matching shape types. This is off by default, so the blend uses the shapes’ curves instead.
- Clockwise - Blend colors clockwise around the hue channel in color modes that have one.
The icon row provides these commands:
 - Create a blend between the selected objects.
 - Create an object representing a single step between two objects.
 - Open the full set of blend options.
 - Replace the blend effect with a group of intermediate objects.
 - Swap the order of the original objects.
 - Assign the selected path to the selected blend.
 - Reverse the blend path’s direction.
 - Remove the blend path.
 - Remove the blend effect from the selected objects.
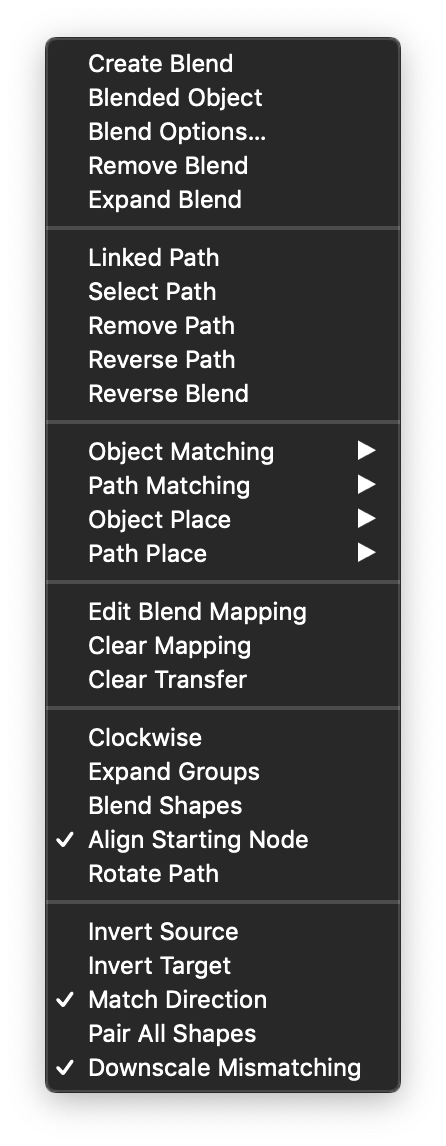
The Blend panel menu.
The panel menu contains additional commands and settings:
- Create Blend - Create a blend between the selected objects.
- Blended Object - Create a single-step blended object between two selected objects. Adjust its blend position in the Appearance panel.
- Blend Options - Open the full set of blend options.
- Remove Blend - Remove the blend effect from the selected objects.
- Expand Blend - Replace the blend effect with a group of intermediate objects.
- Linked Path - Link the blend path to the object used to define it.
- Select Path - Assign the selected path to the selected blend.
- Remove Path - Remove the blend path.
- Reverse Path - Reverse the blend path’s direction.
- Reverse Blend - Swap the order of the original objects.
- Object Matching - Choose how objects are matched when blending groups or symbols.
- Path Matching - Choose how paths are matched when blending composite paths.
- Object Place - Choose the trajectory objects follow during the blend.
- Path Place - Choose the trajectory paths follow within composite paths.
- Edit Blend Mapping - Activate the mapping tool to control how positions on the two shapes correspond. See Blend Tools for details.
- Clear Mapping - Remove all custom mapping pairs.
- Clear Transfer - Remove all shape and style transfer functions.
- Clockwise - Blend colors clockwise around the hue channel in color modes that have one.
- Blend Shapes - Blend the parameters of matching shape types. This is off by default, so the blend uses the shapes’ curves instead.
- Expand Groups - Match objects across the entire contents of a group or symbol. When disabled, preserve the hierarchy and match internal groups first.
- Align Starting Node - Automatically find matching start nodes on the two paths.
- Rotate Path - Rotate intermediate shapes to follow the blend path. This applies only when a blend path is used.
- Invert Source - Reverse the starting shape’s direction.
- Invert Target - Reverse the ending shape’s direction.
- Match Direction - Automatically match the directions of closed shapes.
- Pair all Shapes - Force all shapes to be paired for blending.
- Downscale Mismatching - Scale down shapes that have no matching partner.


