Contour Panel
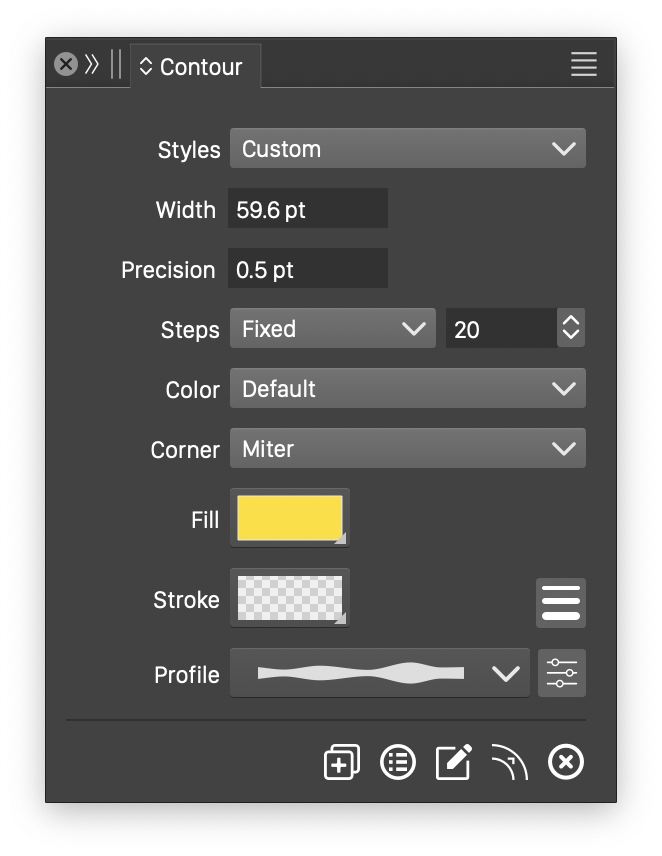
The Contour panel.
Open the Contour panel from Effects - Contour or Panel - Effects to create contours and adjust common settings. When you select a contour object, the panel shows its current settings.
The panel contains these controls:
- Styles - Create or reuse contour presets and styles.
- Width - Set the contour width. Positive values create outer contours; negative values create inner contours.
- Precision - Set the precision used to generate contour shapes.
- Steps - Control the number or spacing of intermediate contours.
- Fixed - Enter the number of intermediate objects.
- Distance - Set the distance between intermediate objects.
- Smooth - Set the smoothness of color transitions.
- Color - Choose the color mode for color transitions.
- Corner - Choose how sharp corners are formed, using the same corner modes as stroke attributes.
- Fill - Choose the final contour’s fill. Intermediate contours blend from the original object’s fill to this style.
- Stroke - Choose the final contour’s stroke. Intermediate contours blend from the original object’s stroke to this style.
 - Edit stroke attributes for the final contour.
- Profile - Choose a variable width profile style or preset. Click
 to open the profile editor, or use the Contour
 tool to edit the profile on the object.
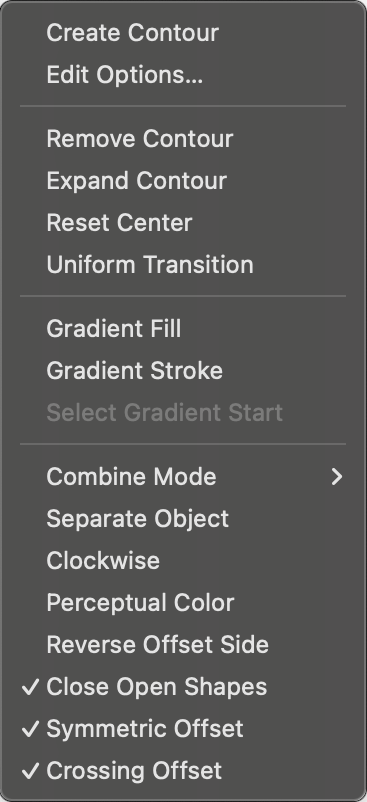
The Contour panel menu.
The icon row provides these commands:
 - Create a contour around the selected object.
 - Open the full set of contour options.
 - Activate the contour editor.
 - Replace the contour effect with a group of objects.
 - Remove the selected object’s contour effect.
The panel menu contains additional commands and settings:
- Create Contour - Create a contour around the selected object.
- Edit Options - Open the full set of contour options.
- Remove Contour - Remove contour effects from the selected objects.
- Expand Contour - Replace the contour effect with a group of contour objects.
- Reset Center - Reset the contour center. You can move it with the Contour tool.
- Uniform Transition - Remove all shape and style transfer functions.
- Gradient Fill - Use a gradient to determine the fill color at each contour step.
- Gradient Stroke - Use a gradient to determine the stroke color at each contour step.
- Select Gradient Start - Set the gradient’s start color from the selected object’s color.
- Combine Mode - Choose how shapes are combined when creating contours for multiple objects.
- Separate Object - Create a separate contour object linked to the source object. This is a compatibility option.
- Clockwise - Blend colors clockwise in color modes with a hue channel.
- Perceptual Color - Use perceptual color blending.
- Close Open Shapes - Close open shapes when creating contours.
- Symmetric Offset - Create both inner and outer offsets.
- Crossing Offset - Allow crossing offsets for open shapes that cross.


